
In the dynamic world of customer relationship management, staying updated on the latest lead assignments is crucial. This guide is designed to empower CRM administrators with the knowledge to seamlessly integrate Dynamics 365 CRM updates into Microsoft Teams notifications. Leveraging the capabilities of Power Automate, we will demonstrate a practical application: triggering an alert in Teams whenever a new Lead is assigned.
We will be using two connectors to build this flow.
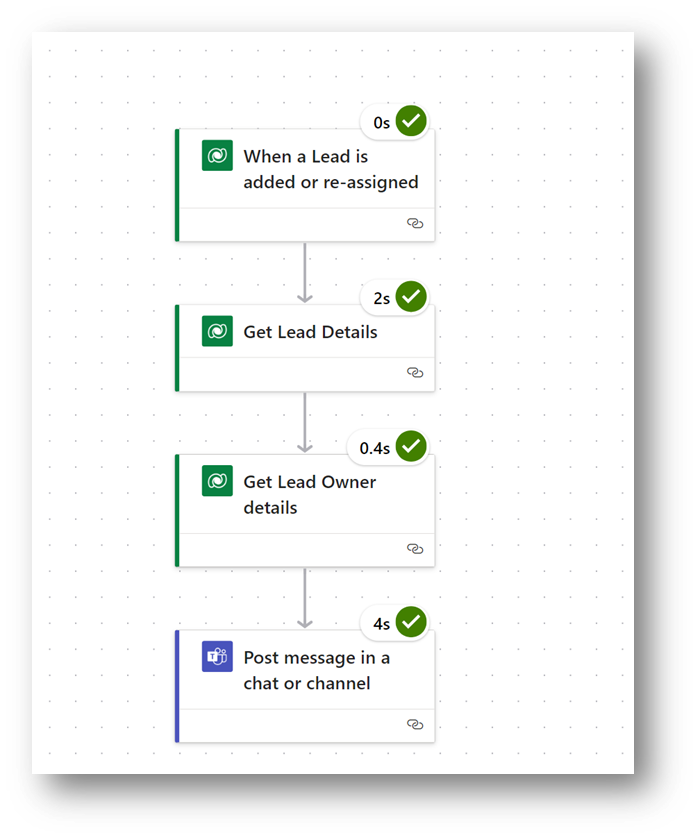
Configure the Trigger in Power Automate
Select an automated cloud flow.
Name your flow and choose the trigger: When a row is added, modified or deleted.

Click Create at the bottom.
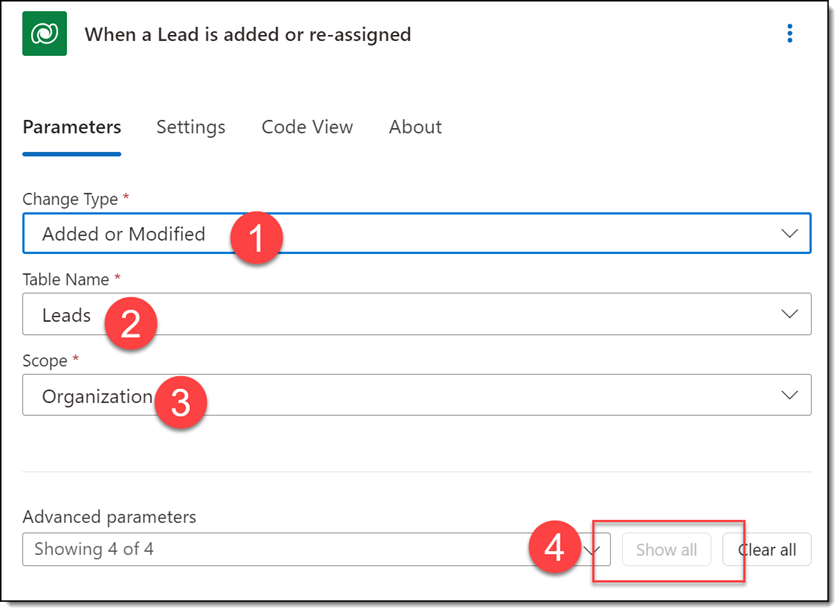
Click in the trigger box to set the following parameters:
- Cgange Type: Select Added or Modified.
- Table Name: Select Leads.
- Scope: Select Organization.
- Under the “Advanced parameters” section, click the Show all button.
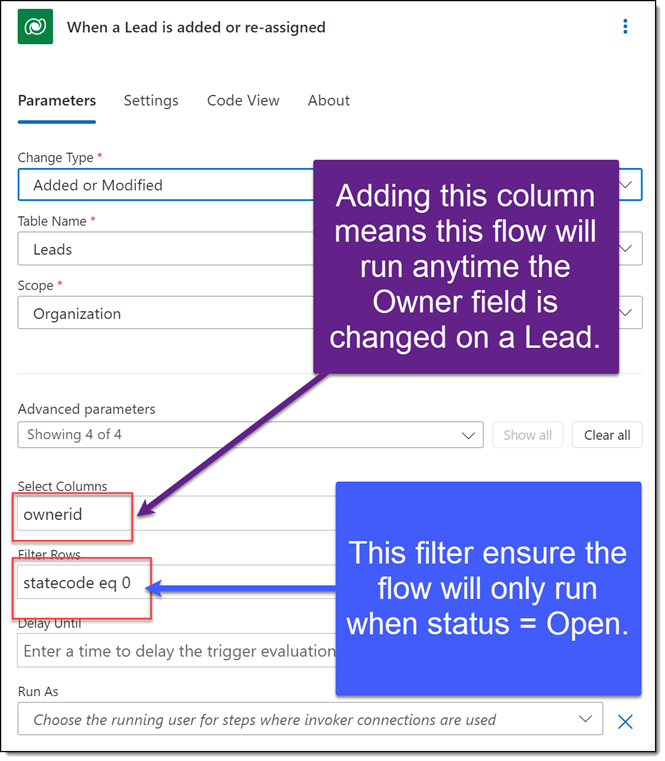
- Under Filter Rows, enter the value: statecode eq 0. Under Select Columns, enter the value: ownerid.
This Odata expression “statecode eq 0” is looking for any Lead with a status of Open. The column selected “Ownerid” is looking for changes to the Lead Owner field. This can be generated from using the XrmToolBox and the tool FetchXML Builder. This tool will get FetchXML we can use to build a more powerful query.
This completes configuration of the trigger! Now it’s on to the actions.
Configure the Actions
First Action: Get Lead Details
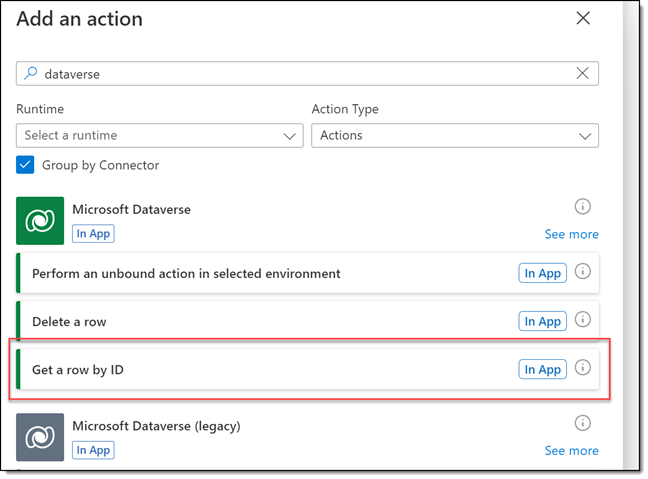
Click the + icon under the trigger, then select Add an action.
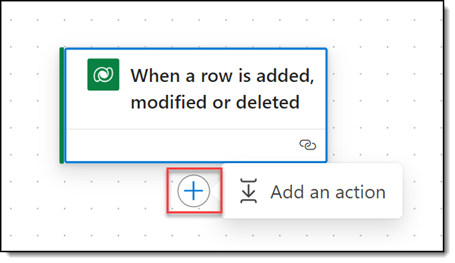
Search from the list of actions to find Dataverse’s action Get a row by ID.

We want to use this first action to get the Lead details that triggered this flow. This way, we can use attributes from that record in the Teams action step.
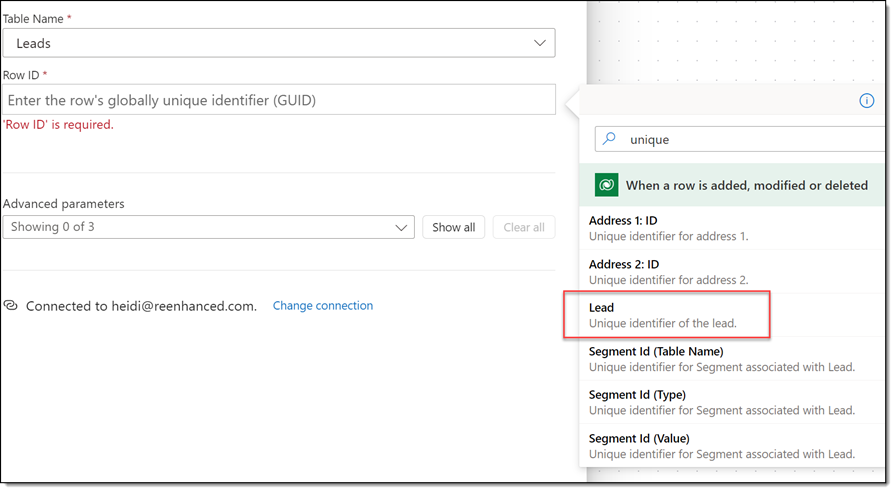
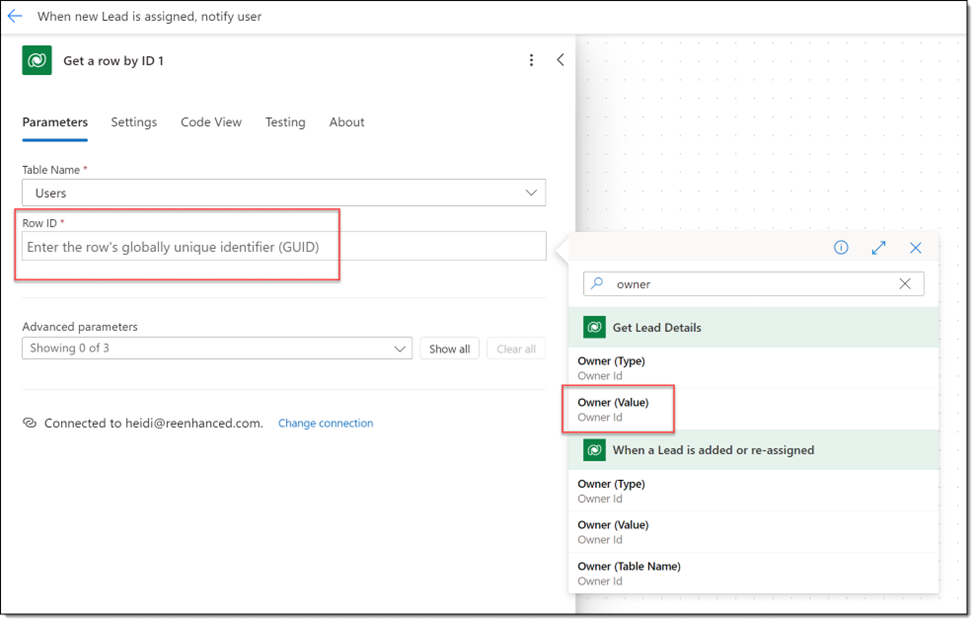
Now, we will configure this action row. Set the following values:
- Table name: Leads
- Row ID: Click in the box, then click the blue lightning icon to get values from previous steps. Select Lead to get the unique identifier. Note: you can search “unique identifier” in the search bar to ensure you are getting a GUID.
Tip! You can rename your triggers and actions! Simply click into the heading of the tab that opens (in this example, click Get a row by ID and type the new name in!)
Second Action: Get Lead Owner Details
For the next action, we need to get the details of the Owner so we know who to message on Teams. First, add a new action with the same Dataverse action: Get row by ID.
Now, we will configure this action row. Set the following values:
- Table name: Users
- Row ID: Click in the box, then click the blue lightning icon to get values from previous steps. Select Owner (Value) from the “Get Lead Details” step. This will return the Lead Owner value.
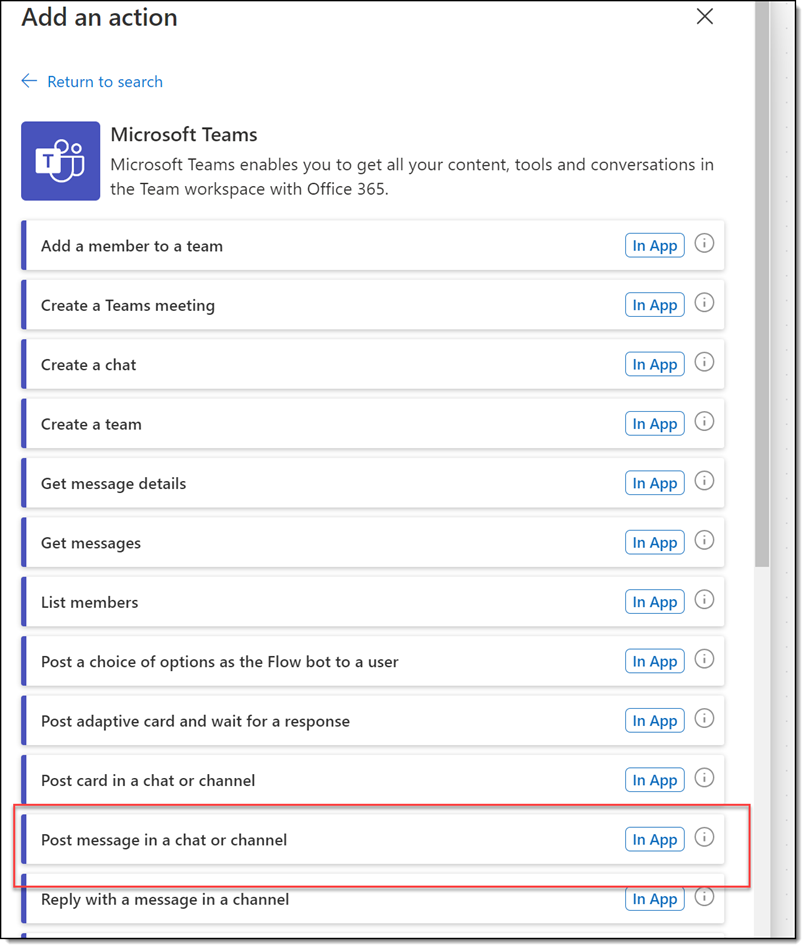
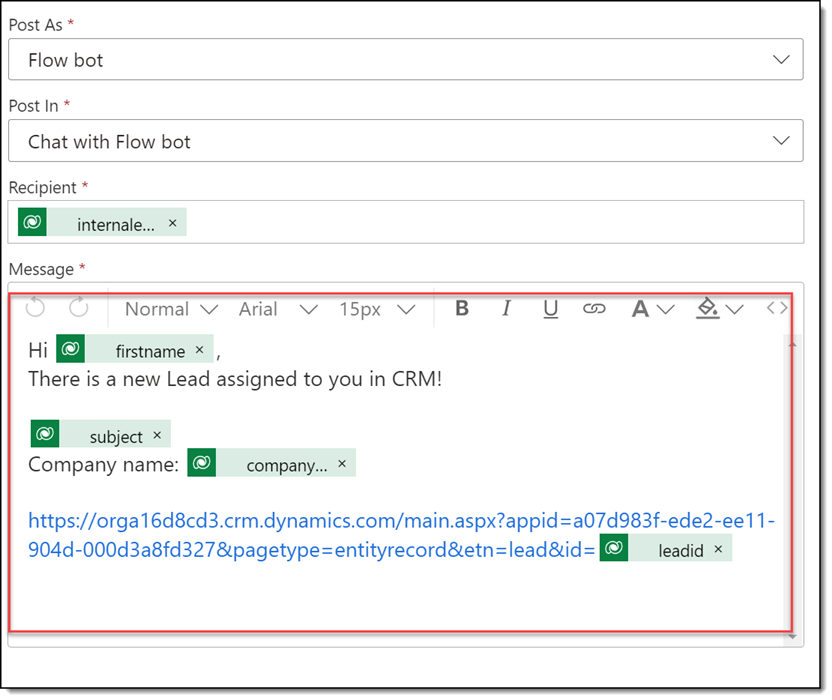
Third Action: Post a message in Teams chat
On to the third and final action: posting the message in Teams! Add a new action under Teams – look for the action Post message in a chat or channel.
Select the following action configuration items:
- Post as: Flow bot
- Post in: Chat with Flow bot
- Recipient: Click in the box, then click the blue lightning icon to get values from previous steps. Select Primary email from the get Lead Owner Details step:
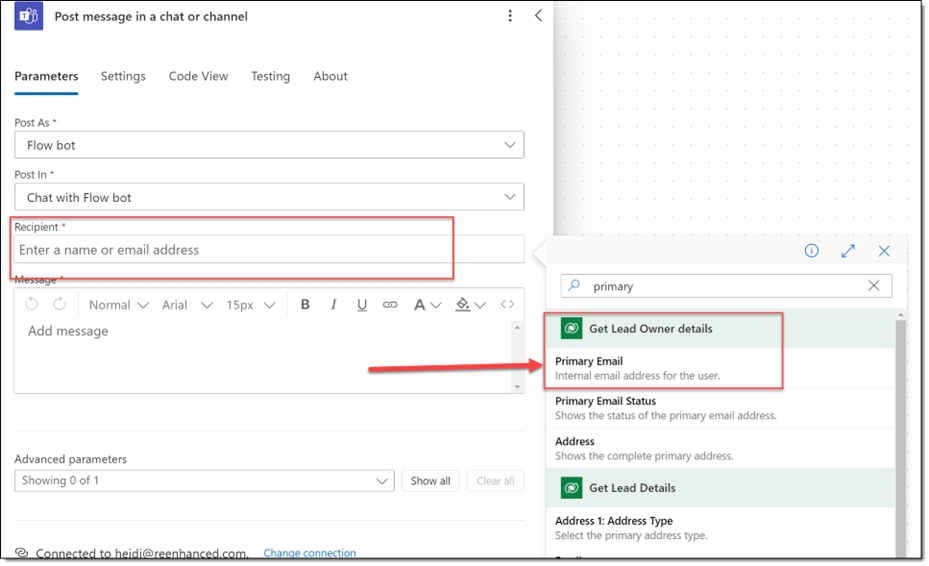
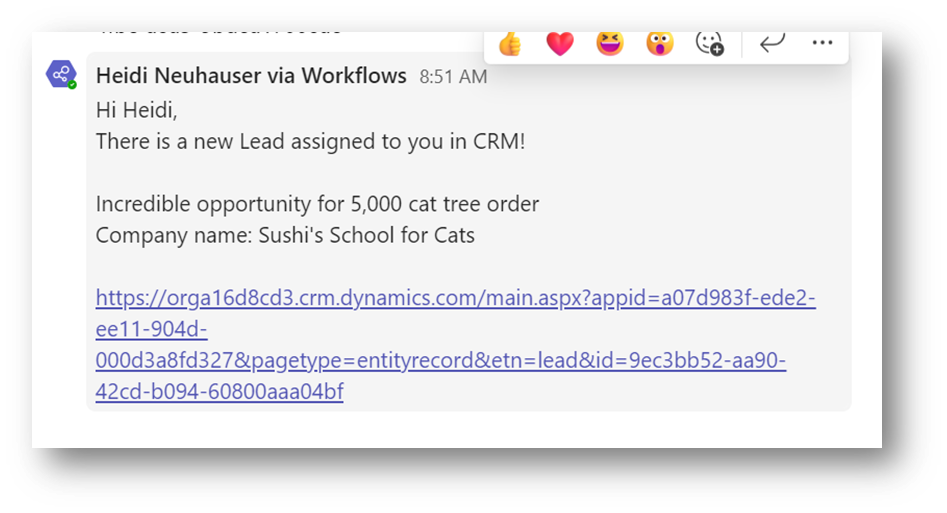
In the Message, enter details about the Lead using values from prior steps.
Tip! You can get URL to the Lead record by following these steps: Check out the video walkthrough here.
Test Your Flow
And that is the flow!! Make sure to run the Flow checker, then test your flow to ensure it works as expected.
Shaheen
Hello Dear Heidi,
You are simply the best.
This was so helpful for me.
Kind regards
Shaheen