This article is an overview of the different types of views available in Dataverse and Dynamics 365 CRM. You will learn how to work with the view canvas, adding and removing columns, changing column width, configuring sorting and editing filter criteria. This article was originally written for dynamicscommunities.com.
Working with Views
A view in Dynamics 365 defines how records for a specific table are displayed. You can configure the columns that are displayed, the width of each column, how the records are sorted and which filters are applied. In your CRM, each area has three different types of views:
- System: These are views that exist for all system tables. These can be Quick Find, Advanced Find, Associated or Lookup views. Visible to some or all users, depending on permissions.
- Personal: Any individual user can create their own personal views. Visible only to themselves and anyone they share it with.
- Public: Views available in the view selector that can be used in subgrids on a form or as a list in a dashboard. Visible to all users.
Updating Existing System or Public Views
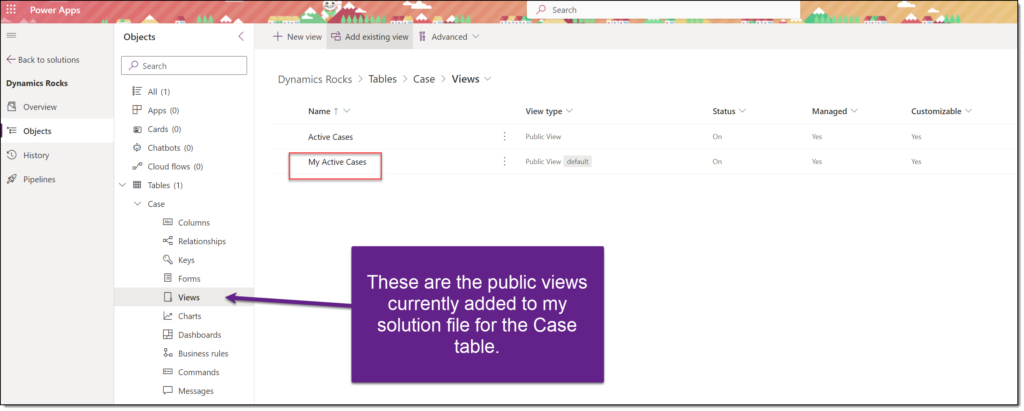
From your solution file, you will need to add views to a table. (If you need a refresher on how to do that, check out this article.)
Once you have added the view(s) you want to edit, open it by clicking on the name of the view in your solution file. (In the steps below, I will work with the My Active Cases public view.)

This opens the View canvas. We can do a number of things from here:
- Add or remove columns from the view.
- Change the column width.
- Update the view name.
- Change / configure sorting.
- Change / edit filter criteria.
In my example, I want to add the following fields to the view:
- Case Stage
- Case Type
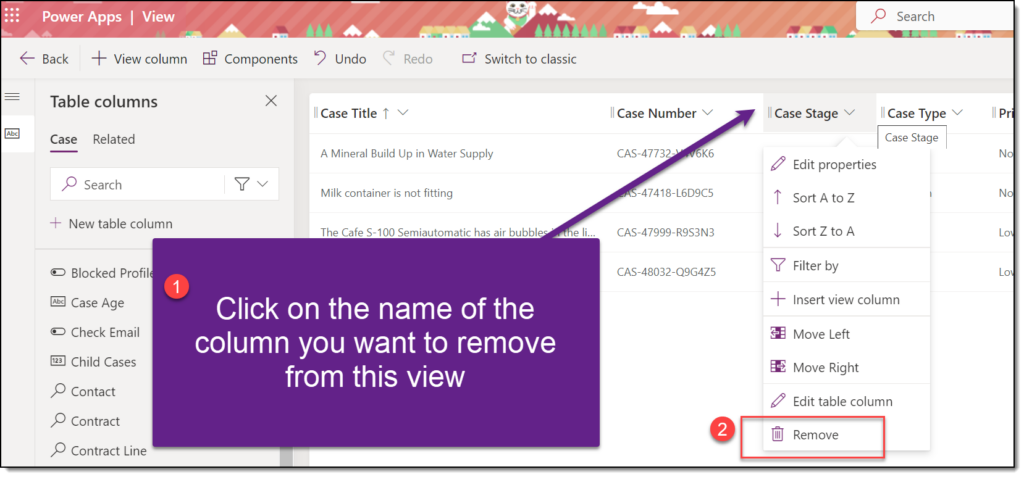
To do that, I will use the left-hand column labeled “Table columns.” I can click on the name of each of the columns and drag them onto the view canvas:
Now that it’s on my canvas, I can see with the real-time data preview that the column Case Stage doesn’t have the data I need. I can remove this column by clicking on the name in the view canvas, then selecting Delete.

If I want to change how the view is sorted, I will go to the right-hand panel and update the information under the heading “Sort by…”

Configure the query running your view by using the “Filter by…” box. Clicking Edit filters in this area will open the query builder in a new window. Add, remove or change lines here to update the data that is displayed in your view. In the example below, I have added a line to show only where a Case Type = Problem.

Once you are finished making changes, click Save and publish in the top right-hand corner of the view canvas:

Adding New System or Public Views
When you need something more than the out-of-the-box views Microsoft provides, it’s time to build your own! You can set the columns that appear, the sort and how the data is filtered.
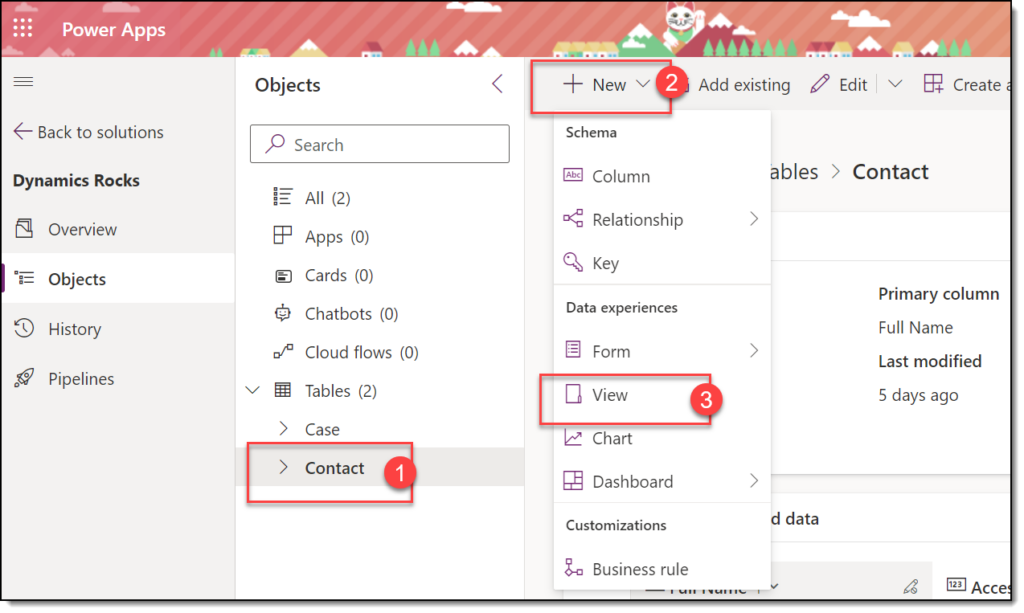
To start, from your solution file, add the Table where your view will live. (For the next example, I will be working with the Contact table.)
Next, from the table in your solution file, click +New, then select View

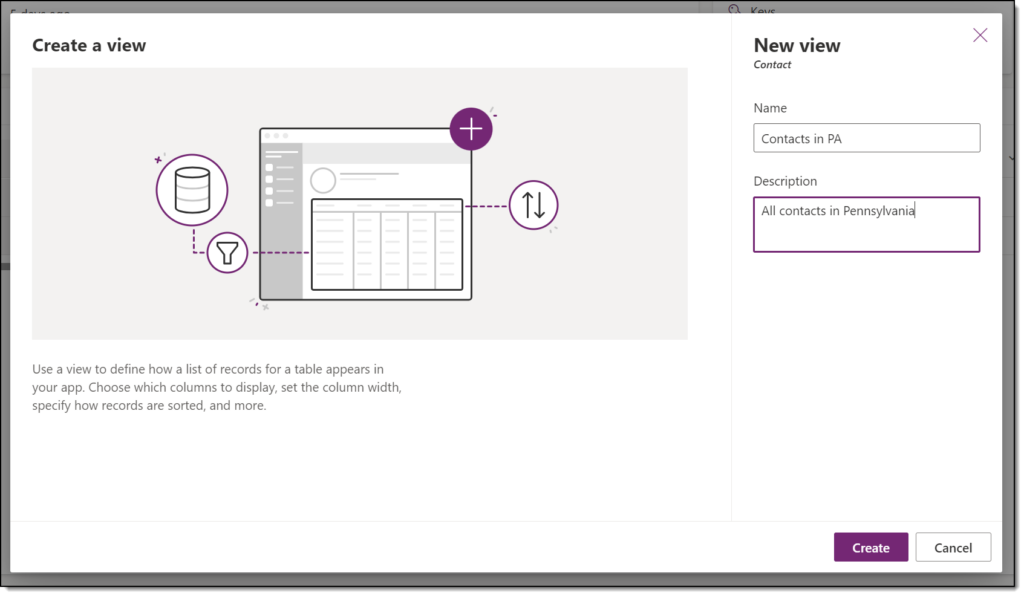
This opens up the Create a view wizard. Add a name and description for your view, then click Create.

Welcome to your blank canvas! By default, you will see the Full Name field here (for Contacts). For other tables, it may be Name or Topic.
Now, you will add columns, add sorting and configure filtering. Use the same process we walked through above in the Editing System and Public Views section. Happy building!
