
Note: This article about using two environments and how to add a sandbox environment in Dynamics 365/Power Platform originally appeared at dynamicscommunities.com.
Lately, I’ve noticed that more and more clients I work with are using one single production environment for their Dynamics 365 system. Their changes are made there without testing. Why? Because they simply were never told about some of the solution management best practices some of us take for granted. I thought I’d pen this article to help anyone out there who was never given this great tip: use at least two environments.
You get as many test environments as you’d like when you have a Dynamics 365 or Power Apps subscription. Minimally, you should have at least two environments:
- Your Production System (where your users are logging in daily, adding and editing their information)
- A Sandbox / Test System
Why Does This Matter?
Simply put: this will help ensure that the changes you make will be successful, won’t impact your end users negatively, and won’t overload your system.
Using more than one environment is essential to testing changes and verifying that new and edited system assets work as expected before going live.
- It avoids publishing a flow or workflow that updates data in the wrong way.
- It gives you an “undo” option if a change you’ve made affects the system in a catastrophic way.
- It avoids needing to restore an old backup.
- You don’t have to worry about the system breaking unintentionally for users during busy parts of the day.
How to Add a New Sandbox Environment
If you only have one environment today, you can add more. Follow these steps to create a new Sandbox system.
Before you add a new Sandbox environment, you’ll need System Administrator security role permissions.
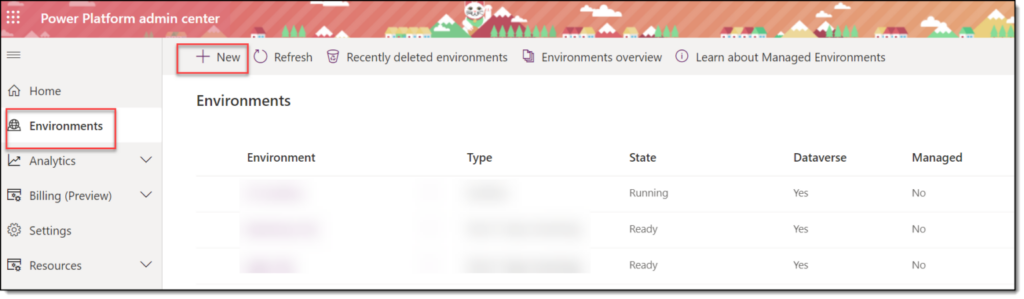
- Go to admin.powerplatform.com
- On the left-hand menu, select Environments
- Select + New
Fill Out Fields to Create New Environment
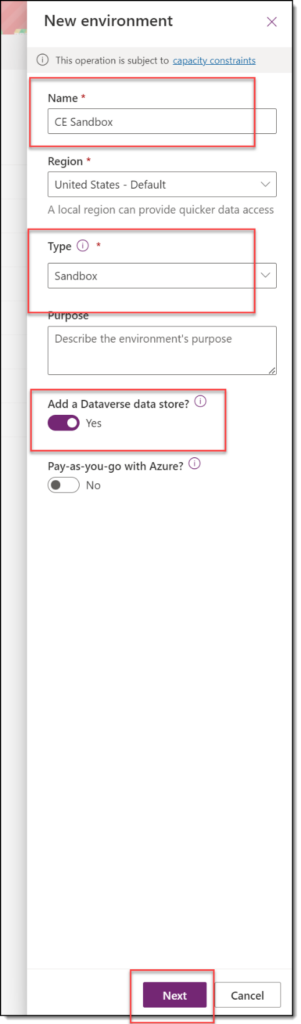
- Enter Name, Region and Type = Sandbox
- Add a Dataverse data store? Yes, then click Next at the bottom of the panel
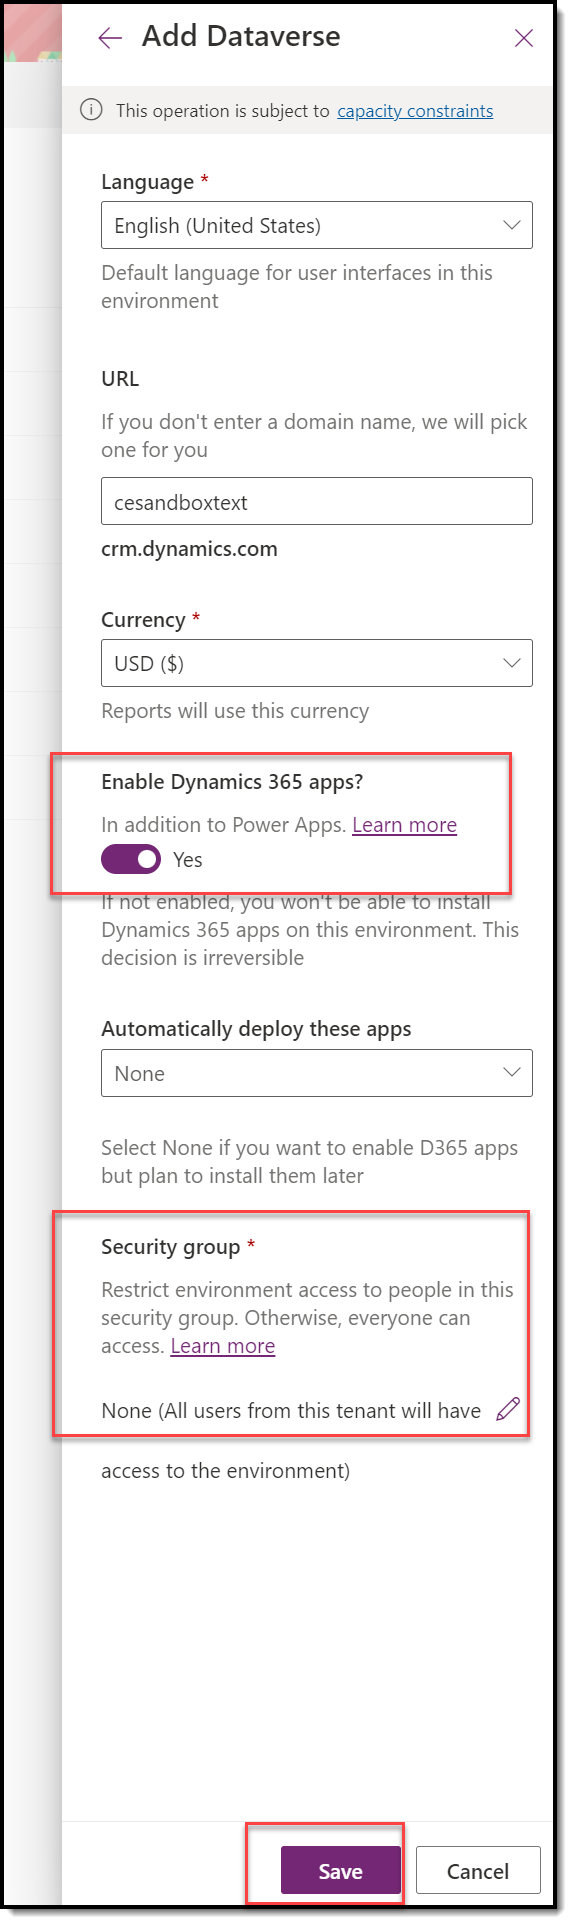
3. On the next screen, you can change Language and Currency and set a custom URL. Make sure to change these fields:
- Set a Security Group to control access to this environment. If there are no security group restrictions, select None.
- Change Enable Dynamics 365 apps? to Yes (if using Dynamics 365, otherwise keep is as No if using Power Apps only)
- Click Save at the bottom.
Before proceeding to the next step, you need to wait until the Sandbox has been prepared and is marked as “Ready” in the State column. This will take several minutes to complete.
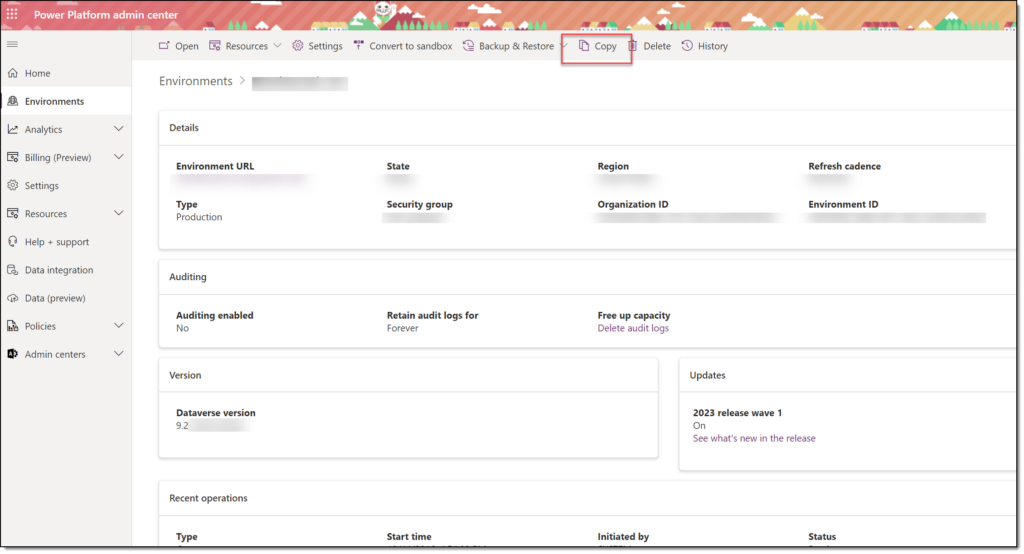
Next, open your Production environment from the list of environments. At the top, click the Copy button.
Make sure to set the new Sandbox you created in steps 1-5 above in Select target environment to overwrite (circled below).
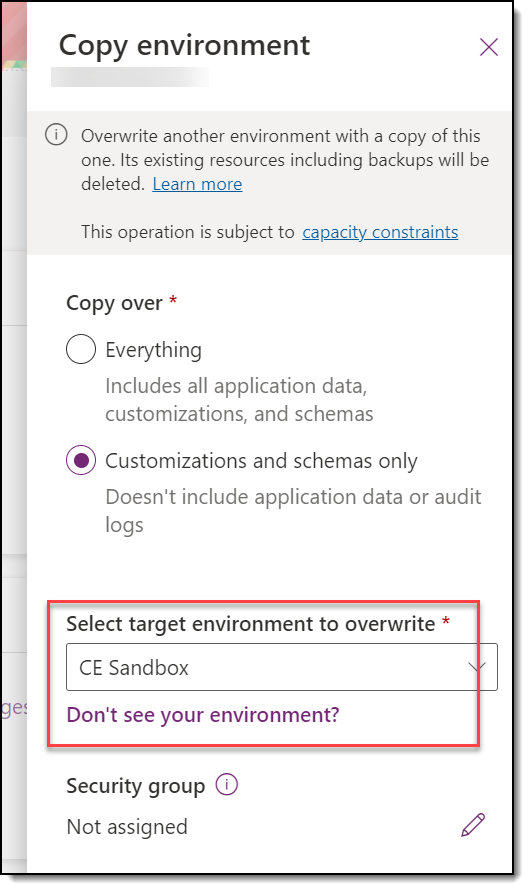
In the Copy over the section, you’ll need to select either:
- Everything: This is EVERYTHING, data included. This can drastically increase your Dataverse storage. If you’re using this environment for testing configuration changes, you do not need everything. If you are using this for UAT, you may want to consider using everything to give your users a close-to-production experience for testing.
- Customizations and schemas only: This brings over only your customizations and configurations. No data will be included.
You can expand the Edit Details section below the Security Group details to update the Sandbox name and URL:
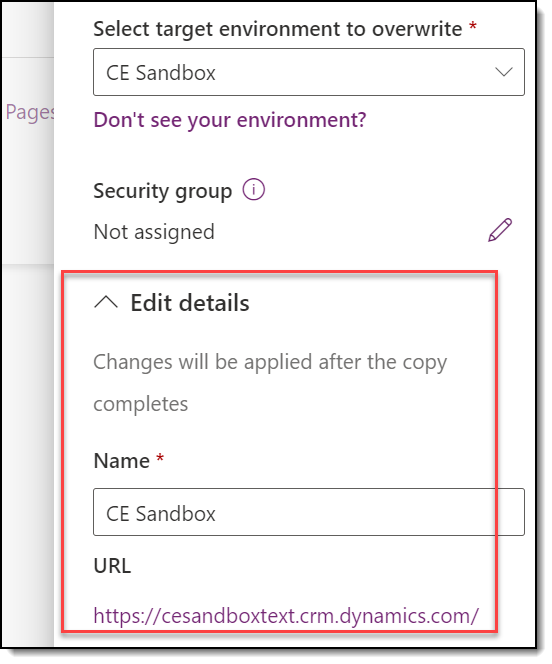
Click Copy at the bottom. Now, just wait until the updates are complete and you have a brand-new Sandbox system ready for your use! Congratulations on learning how to add a sandbox!
Note: Your newly copied environment will be placed in administrator mode by default. This means that only users with the security role of System Administrator can log in and manage it. A system admin can update this if you want your end users to be able to access the new Sandbox system.