
As you craft your flows in Power Automate, you will start to get to know the 14 built-in connectors and actions that you can use to enhance your automations. This blog will review the Triggers, Actions and Connectors that are built-in for your use!
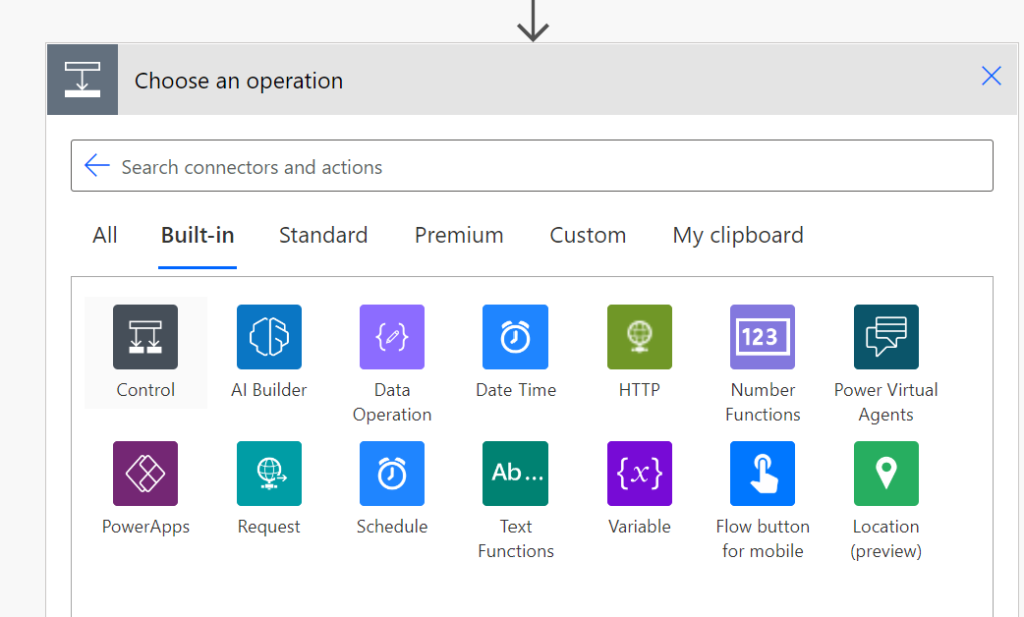
Control
I use the Conditional action that is part of the Control connector more than any other built-in tool in Power Automate. It lets you define a positive and negative path for your flows – if the defined condition is met, the automation continues down the Yes path. Otherwise, you can configure unique steps in the No path.

Other things you can do with the Control connector:
- Apply to each
- Do until
- Scope
- Switch
- Terminate
This is one super handy built-in connector!
AI Builder
The AI Builder connector has 19 different actions to help analyze your data. Some of the actions are:
- Analyze positive or negative sentiment in text
- Detect and count objects in images
- Detect the language being used in text
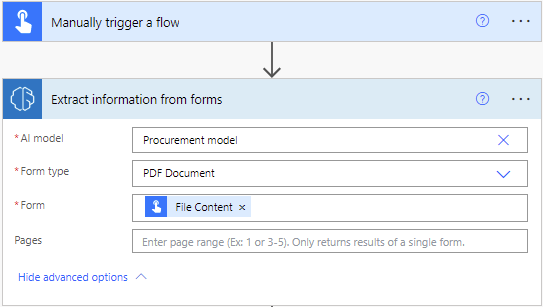
- Extract information from documents
- Extract information from forms
- Extract the key phrases from text
- Predict
- Read business card information
- Recognize text in an image or a PDF document
- Translate text into another language
See full documentation on AI Builder use cases and examples here.
Data Operation
The Data Operation connector has 7 actions to help transform and update your data.
- Compose: Use to avoid entering the same data multiple times as you design a flow, or to transform data into a different type/format.
- Join action: Join data together and select join with character.
- Select: transform the shape of objects in an array.
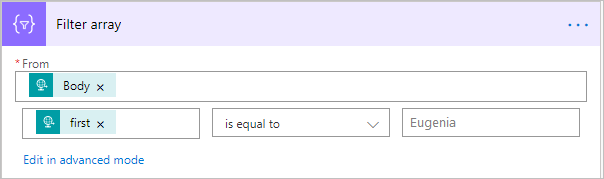
- Filter array: reduce the number of objects in an array.
- Create CSV table
- Create HTML table
- Parse JSON
See full documentation on data operation use cases and examples here.
Date Time
This helpful connector has six great actions:
- Add to time
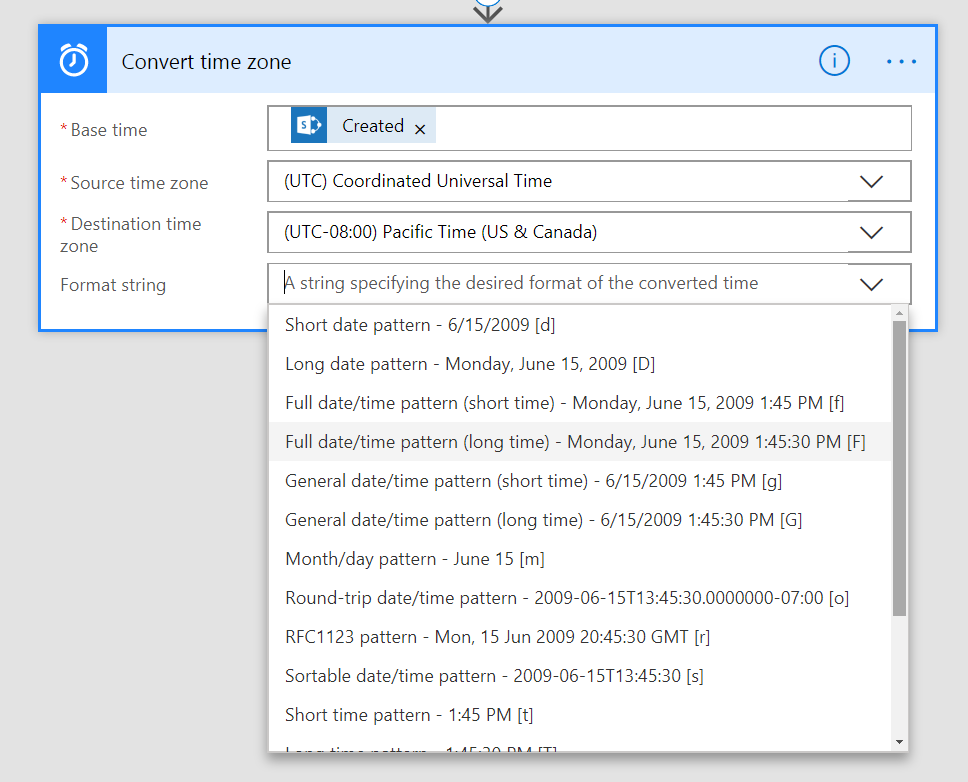
- Convert time zone
- Current time
- Get future time
- Get past time
- Subtract time
HTTP
Now, we are diving in deeper to some of the more technical functions within Power Automate, and farther outside of my comfort zone! Since I am no expert here, I’d love to direct you to this course through Microsoft Learn that is specifically about each of the 3 actions/triggers in the HTTP connector.
There are 3 identical triggers and actions in this connector:
- HTTP: You can use this action to connect to to a service or data source that does not have a direct connector. Supports GET, PUT, POST, PATCH or DELETE methods with authentication options for Basic, Client Certificate, Active Directory OAuth and Raw.
- HTTP + Swagger: uses an API specification file (similar/identical to what is used to build a custom connector) to make HTTP requests with a definition file for how the requests are supposed to be made as well as what the responses should look like. My super technical business partner and husband Nick Hance tells me “you should almost always build a custom connector instead of using this one.” Want to debate him on it? Send him a message on LinkedIn!
- HTTP Webhook: allows you to trigger a flow by sending an HTTP Request to Power Automate. When you configure this trigger, you’ll get a HTTP URL that you can copy and paste into your other application. Any requests sent to that URL will trigger your flow. Nick Hance tells me that this one is super useful!
Number Functions
This connector allows you to format a number. It’s straightforward and easy to understand. Simply map the Number and define for format string within the action.

Power Virtual Agents
This connector has one trigger:
- When Power Virtual Agents calls a flow: This operation establishes a connection to Power Virtual Agents.
And one action:
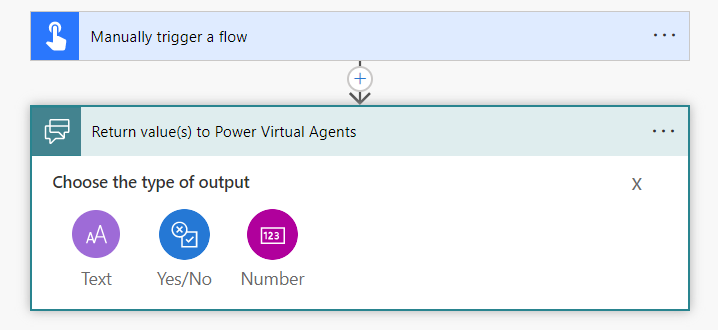
- Return value(s) to a Power Virtual Agent: This operation returns value(s) to Power Virtual Agents. You’ll have to define the output, selecting from: Text, Yes/No or Number.
Power Apps
This connector has two triggers:
- PowerApps: Use a button or link in PowerApps to trigger an action in this flow.
- PowerApps (V2): Trigger the flow from PowerApps, perform some other work of your choosing, and then return a response back to PowerApps.
And one action:
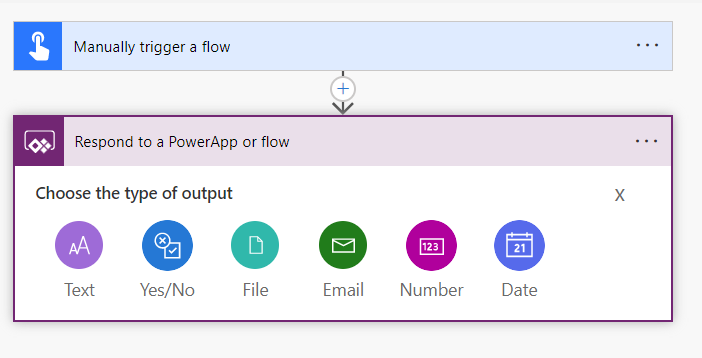
- Return to a Power App or flow: Trigger the flow from PowerApps, perform some other work of your choosing, and then return a response back to PowerApps.
When using this action, you’ll need to select the type of output. Your options are: text, yes/no, file, email, number or date.
Request
The Request connector has one trigger:
- When an HTTP request is received: This is an incoming API call that could use actions in a Logic App or other API to trigger this flow.
And one action:
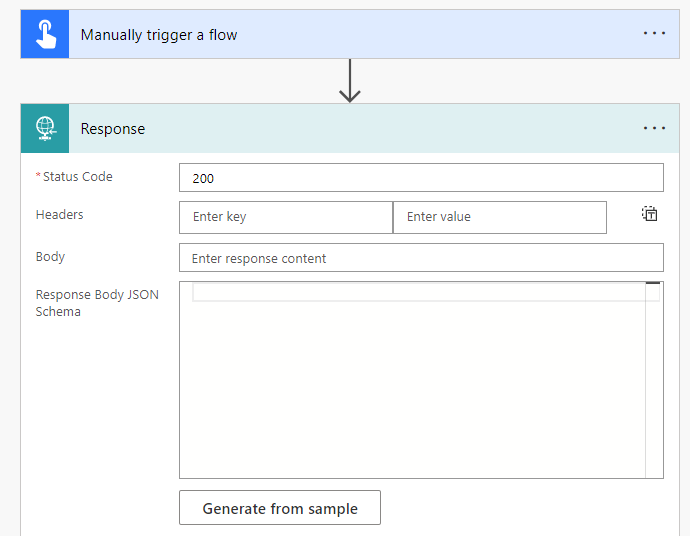
- Response: This is an incoming API call that could use the results of an action to trigger this flow.
Schedule
This connector has one Trigger:
- Recurrence: Triggers an event to run at regular, customized time intervals.
And two actions:
- Delay: Sets how long an action should be delayed once the flow is triggered.
- Delay until: Delays an action until a specific date. For shorter time periods, use the Delay action instead.

Text Functions
Two actions:
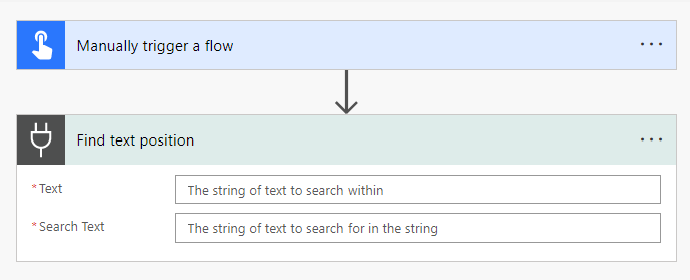
- Find text position: Finds the numeric position of a character or string
- Substring: Returns a subset of characters from the string
Variable
This is a powerful built-in connector where you can both create a variable, declare its type and initial value within one action in your flow. Admittedly, this is not my forte, so I’d love to direct you to the Microsoft Docs documentation and this YouTube video from Reza Dorrani.
Here are the actions available in the Variable connector:
- Append to array variable: Appends value to array variable.
- Append to string variable
- Decrement variable
- Increment variable
- Initialize variable
- Set variable
See full documentation on the variable connector use cases and examples here.
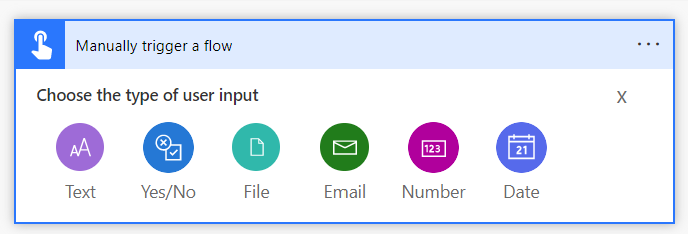
Flow Button for Mobile
This is a wonderfully simple trigger to kick off a flow! Manually trigger a flow – which is the flow button for mobile. You can select from the following user imputs:
- Text
- Yes/No
- File
- Number
- Date
After that, add actions to complete your automation!
Location (Preview)
Note that this connector is in preview right now. But what a COOL trigger this one has: When I enter or exit an area.
Let’s look more at this trigger. The first thing you need to do is Create Trigger Region. You can do this by entering an address, coordinates or using the map. Once you’ve defined the region, click Save.
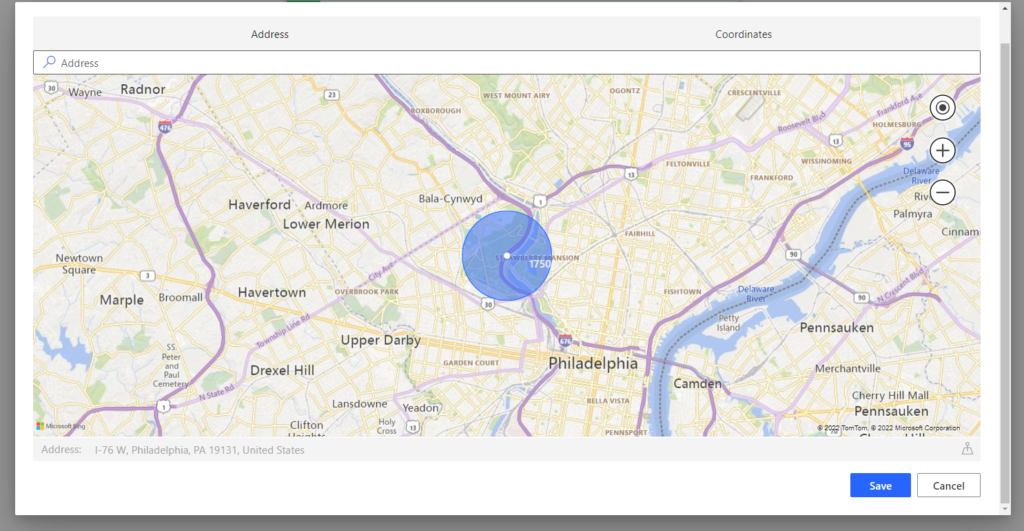
After the region is defined, you can add actions to complete your flow.
Gilles PION
“When I enter or exit an area” trigger suddenly stopped for me few months ago
The “create trigger region” form show the map with the following error message :
“The specified credentials are invalid. You can sign up for a free developer account at http://www.bingmapsportal.com”
I havent’ been able to get any help on that issue
Heidi Neuhauser
That’s likely because the connector is in preview. They will often change parts of it and it will be quite difficult to get support until it’s moved to General Availability. I’m sorry I don’t have anything better to share on that for you!
Gilles PION
And now it’s marked as “deprecated”
Which alternative could be used
Heidi Neuhauser
I don’t know that there is an alternate to Location actually. I don’t see any similarly tagged connectors on https://www.connectorreview.com/.
🙁