The Dynamics 365 App for Outlook can be an extremely useful and productive tool for your users. If you have build custom tables in your model-driven app, you likely want emails to be set regarding them, but you’ll need to make some updates before your users can do this. There are only two steps to add a custom table to Dynamics 365 App for Outlook:
- Enable Activities on your custom table.
- Add the custom table to your Dynamics 365 App for Outlook model-driven app.
In this article, I will walk you through both.
Note: you will need System Administrator or System Customizer security roles to perform the following updates.
Enable Activities on a Custom Table
If you want to be able to use your custom table in the Outlook app, the first thing you need to do it to enable activities. Follow these simple steps:
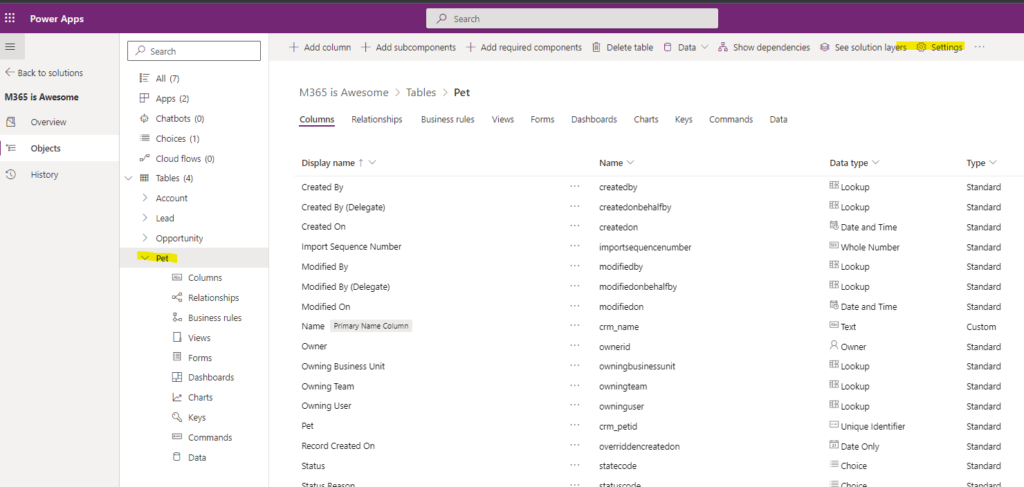
1. Add the custom table to a Solution file.
2. Expand the table, then click the Settings icon in the top banner.

3. Click Advanced options to expand additional options. Scroll down to the Make this table an option when section. Check the box next to Creating a new activity.
IMPORTANT! After you enable activities in this set, it cannot be undone!!

4. Finally, click Save.
Updating the model-driven app
Now that your custom table is ready to rock and roll, it’s time to update the Dynamics 365 App for Outlook. Make sure the model-driven app has been added to your solution file.
1. Open the App in the Modern Designer in Power Apps. (Note: you can use the classic design experience as well, but the following screenshots are used with the modern designer.)
2. Go to the Navigation area. Click + Add, then select Subarea.

3. Select Content type = Table, and Table = your custom table (in this example: Pet). A Title will auto-populate, but you can override this if you’d like. Click Add.

4. The custom table now appears on the canvas preview. Make any additional changes, then click Save and Publish.

