
Last week, Microsoft announced the new model-driven app design experience. For any Dynamics 365 online and Power Platform customers, this presents a brand new way to build. With any big change, it can be a little overwhelming learning to navigate a new interface at first. In this blog, I’ll walk through the new design experience versus the legacy experience to help you become more comfortable with this big change.
Model-driven app design experience
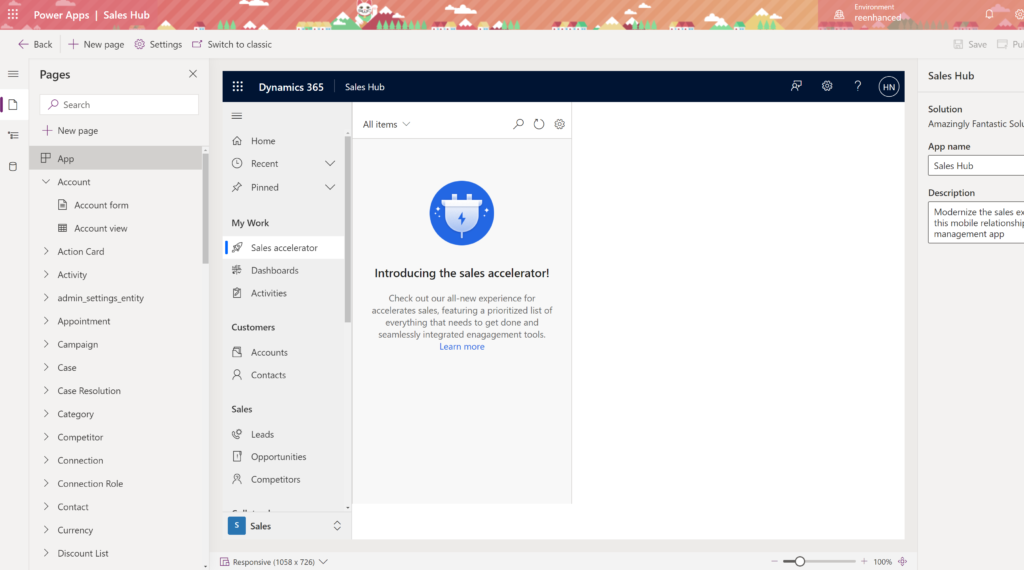
The big change here is that everything is done in one canvas! It’s pretty neat. Here’s a snapshot of what it looks like for an existing app:
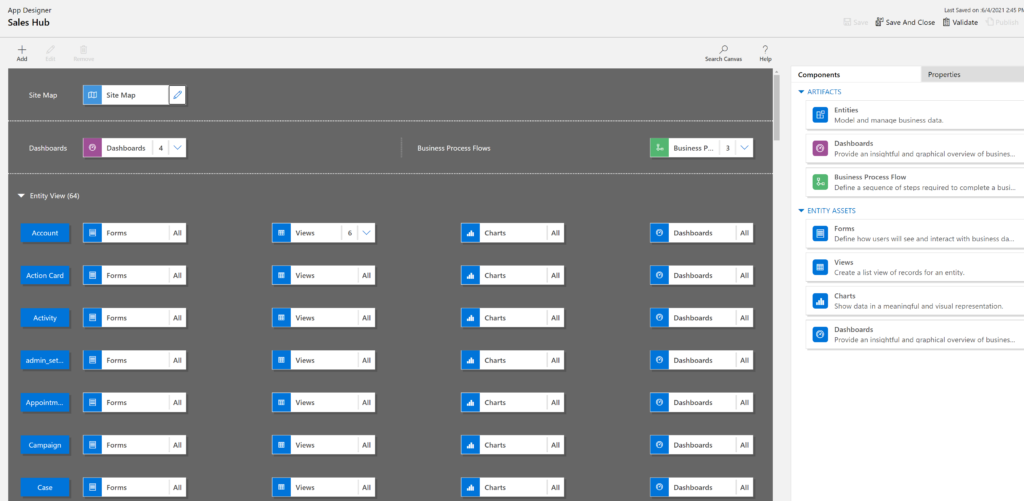
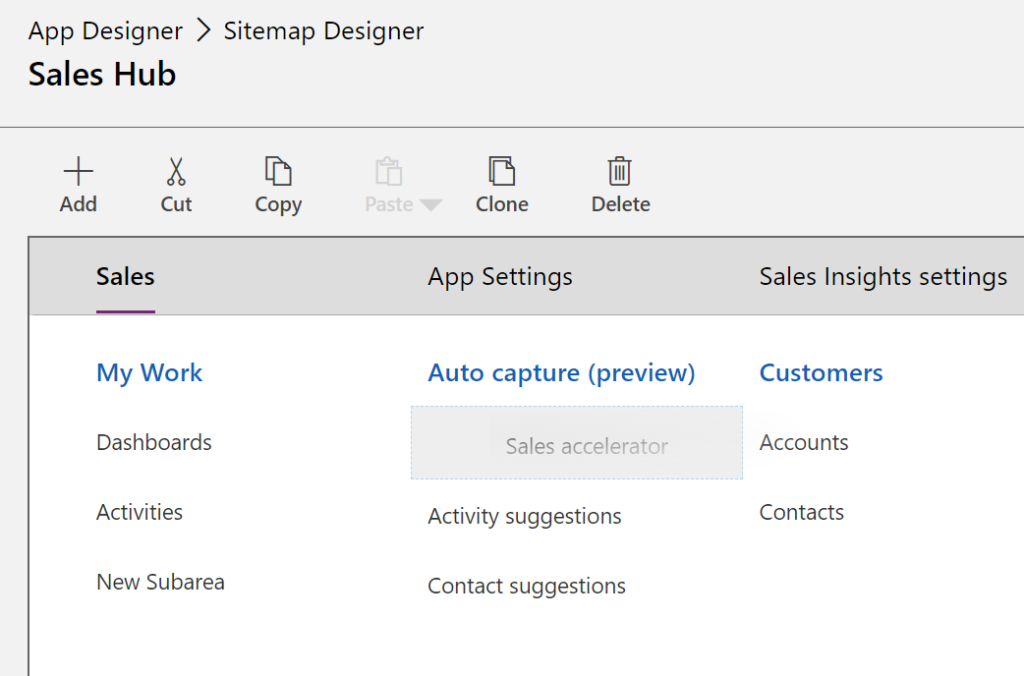
We can contrast this to the legacy design experience, which looks like this:
There are quite a few differences you’ll spot right away:
- There is no Sitemap.
- You no longer need to define components like artifacts and entity assets in separate blocks.
- You can now see responsive design on desktop, mobile and tablet.
- There is a preview of the app in real-time as you make changes.
For the remainder on this blog, we will take a look at how to accomplish common tasks using the new model-driven app design experience. Here are the items we will review in depth below and the winner of each: the old way or the new way!
| Task | Winner |
|---|---|
| Adding a table to your app | The new way |
| Selecting specific forms & views for your app | The new way |
| Moving a table to a different part of your app | The old way |
| Preview your app | The new way |
Adding a Table to Your App
The winner here: The New Way.
The Old Way (Classic App Designer)
- Open the App Site Map.
- Add a new Subarea in the appropriate Group, then define Type and enter additional details (Entity or URL).
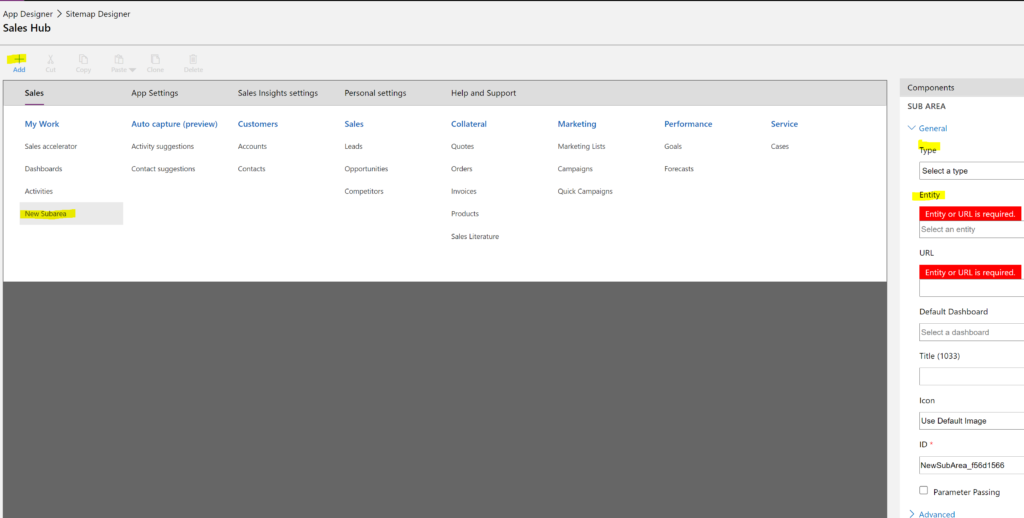
3. Save and Publish your changes.
The New Way (Modern App Designer)
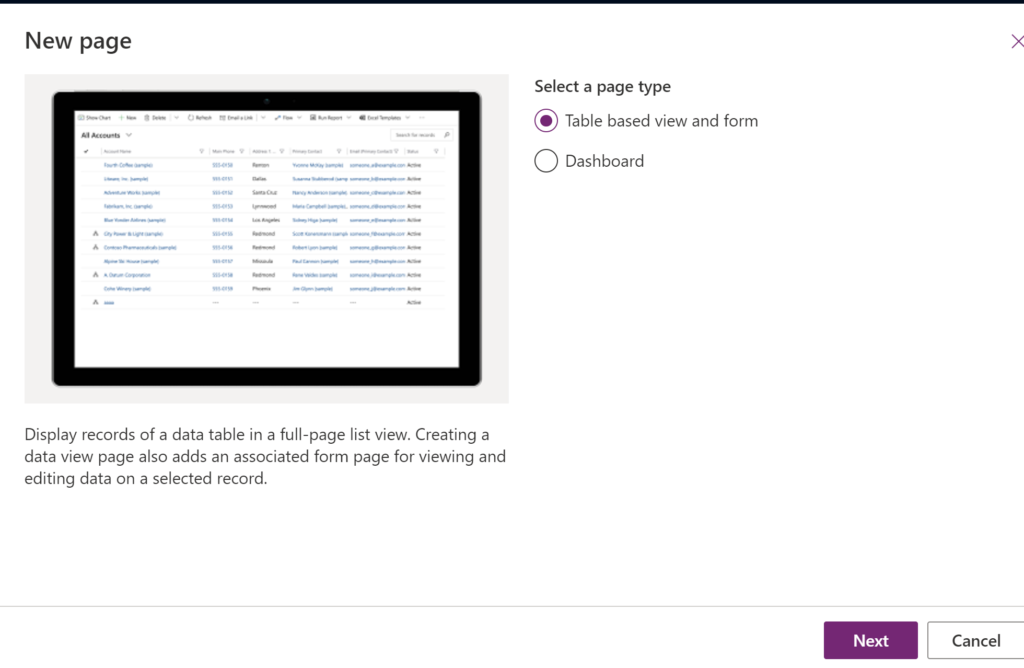
- Click New Page.
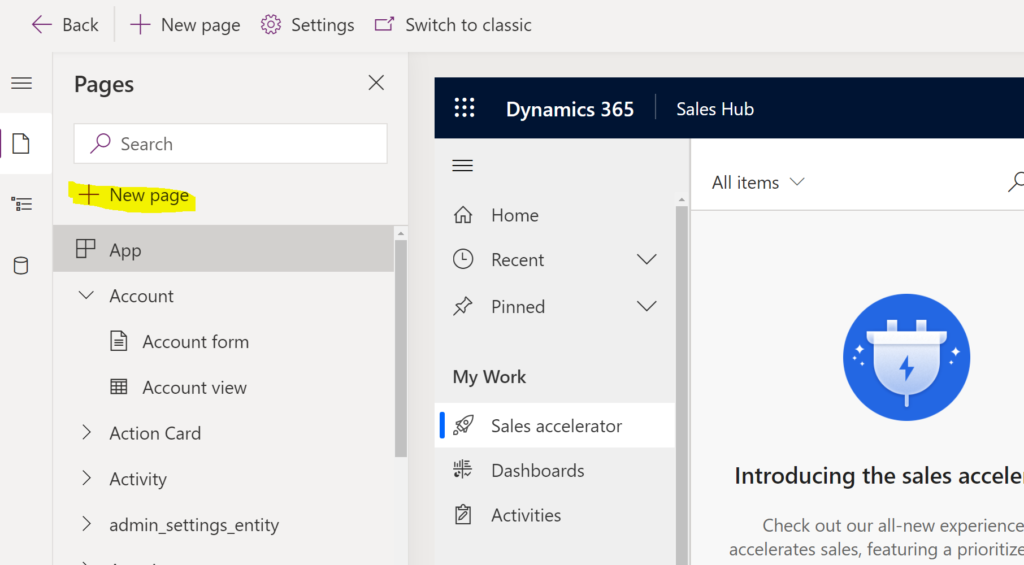
2. Select Table based view and form or Dashboard, then click Next.
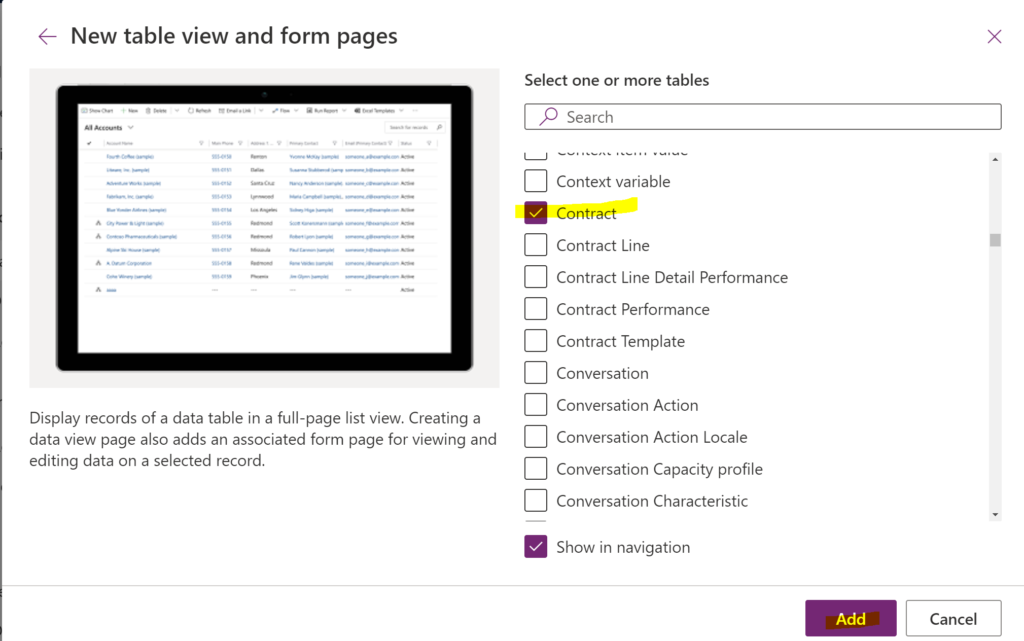
3. Select your table, then click Next.
Selecting specific forms and views to display in your App
The winner here: The New Way.
The Old Way (Classic App Designer)
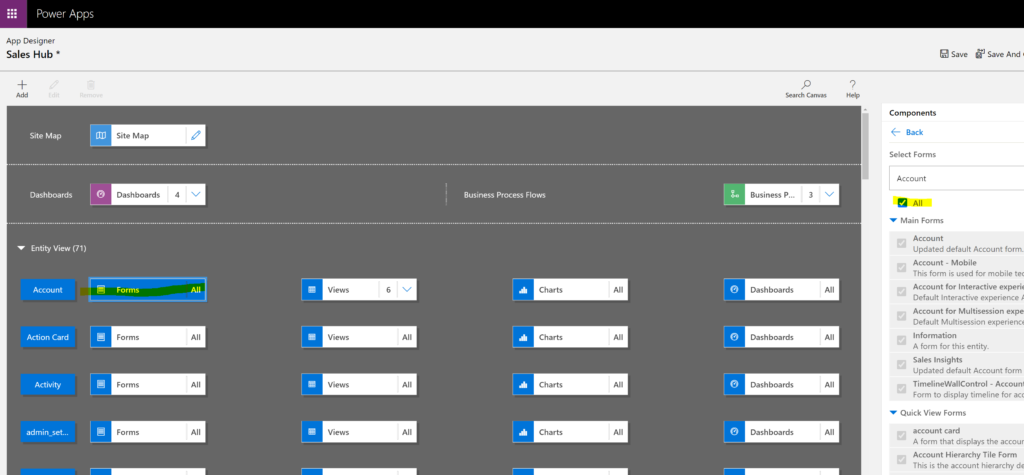
From the App designer canvas, click on the table (entity) and then the forms box. Uncheck the All box in the right-hand panel, then select forms you want users to see in your App. Repeat for the Views box. Repeat for all tables (entities). When you have finished, click Save and then Publish at the top.
The New Way (Modern App Designer)
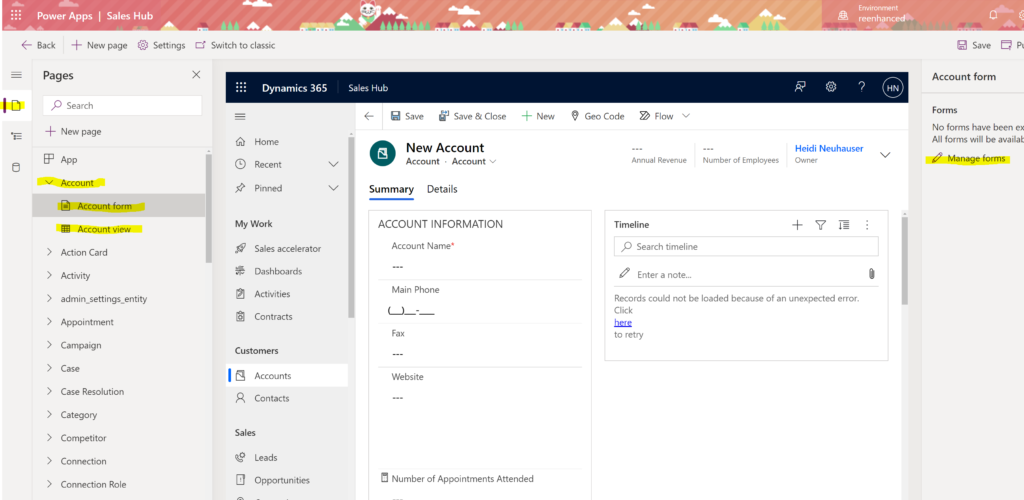
Make sure you are in the Pages area on the navigation pane on the left-hand side. From here, expand the table (in this example, we are using Account) to view “Account form” and “Account view.” As you click Account form, the panel on the right-hand side shows which forms are included. Click Manage forms to update. When you have finished, click Save and then Publish at the top.
I really love that you can preview the forms on the canvas in real-time! Oftentimes, I have the front end of my app open to try to figure out which forms are being used. This saves me time and clicks when I want to streamline which forms are visible to my users!
Moving a table to a different part of your App
The winner here: The Old Way.
The Old Way (Classic App Designer)
Click and drag the tables (entities) to the Groups you want them to appear.
The New Way (Modern App Designer)
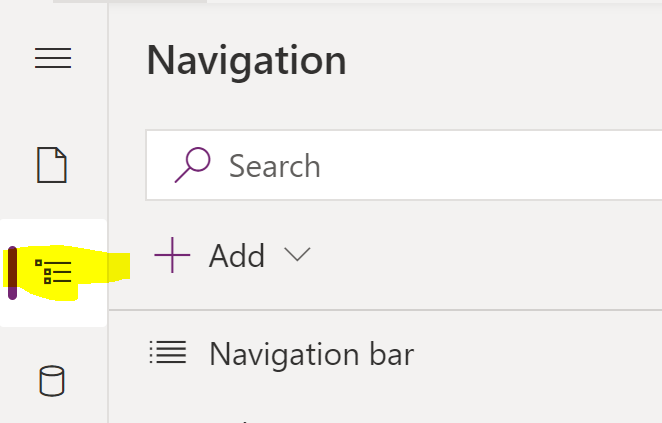
First, click on the Navigation icon, highlighted below:
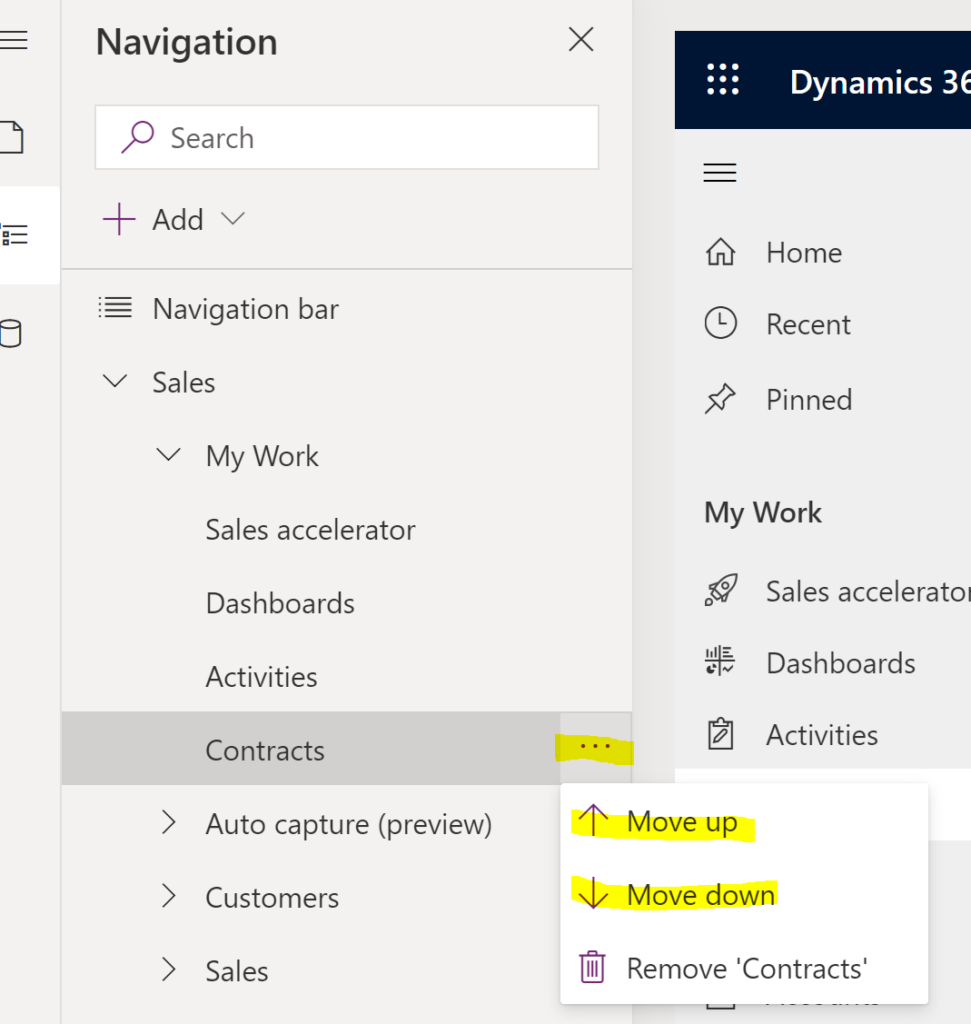
Once here, find the table you want to move and click the ellipses next to it (highlighted below). Then, use the Move up and Move down options to move it to the desired spot.
Previewing your App
The winner here: The New Way.
The Old Way (Classic App Designer)
From the app designer, click the Play icon at the top. This will give you the user view of everything you have configured in the App.
The New Way (Modern App Designer)
Your preview appears as you make changes in real-time. There is nothing additional you need to do – just take a look at your canvas! You can still launch a full preview by using the Play icon at the top.
Learn more!
If you’re looking for more resources, here are a few for you to check out:
- This video I made comparing both design experiences.
- Microsoft documentation – lots of goodies in here!