

Business rules are a powerful available to any Dynamics 365 System Administrator. They allow you to use a simple drag-and-drop interface to perform complex logic on a form. One intriguing option available using a business rule is to provide a recommendation to your users.
What does a Recommendation look like in Dynamics 365?
You can use Recommendations to provide a suggestion to your users on how to fill out a field. Once a specified condition is met, a reminder icon will appear. Clicking on this small icon expands the recommendation you configured in the Business Rule. Clicking on the Apply button will perform the action you configure in your Business Rule.

Configuring a Business Rule
Creating a business rule is very simple, provided that you have proper security permissions (System Administrator or System Customizer security roles). Start with a solution file in your Sandbox environment, navigate to the table where you’d like the Business rule to run. In these screen shots, I am using the Account table.
In that table, at the top, click on the Business rules header then select Add business rule in the top ribbon:

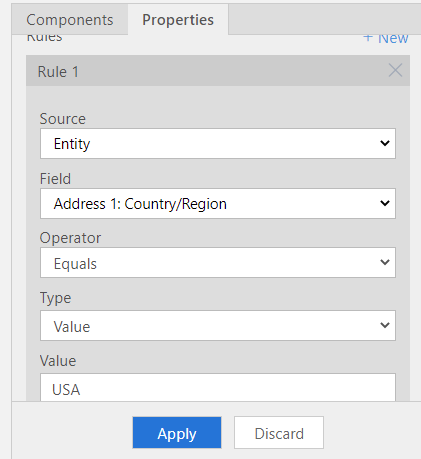
This opens the Business Rules designer, which has a simple to use drag-and-drop interface. All Business Rules are triggered by a conditional, which you will see on your designer. Click into the Conditional box to set the conditions.
In this example, our Conditional is: If Address 1 Country/Region = USA:
Next, we need to add the Recommendation action on our Canvas after our Conditional:
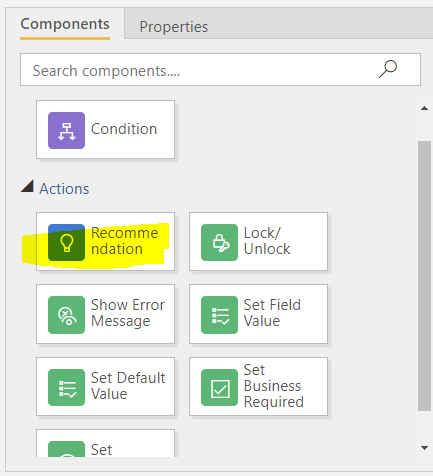
Add Recommendation
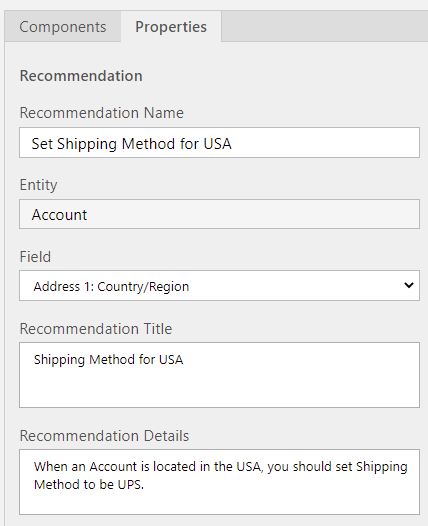
When you add a Recommendation action to the canvas, you will need to provide the following detail:
- Recommendation Name: A name for the design and label of this action in the Business Rule. This will not be displayed to a user.
- Entity (this will default to the entity/table where you added the Business Rule)
- Field: Select the field that triggers this recommendation.
- Recommendation Title: This will be the bold text a user sees when they click the recommendation icon on a form.
- Recommendation Details: This is the detail displayed when a user clicks the recommendation icon on a form.

Configure each of these fields to display the detail need. In this example, we have added the following information to our action:
Next, expand the Action section inside of your recommendation box. This is the action that will occur if the user follows the suggestion. Select the field and what the value should be.
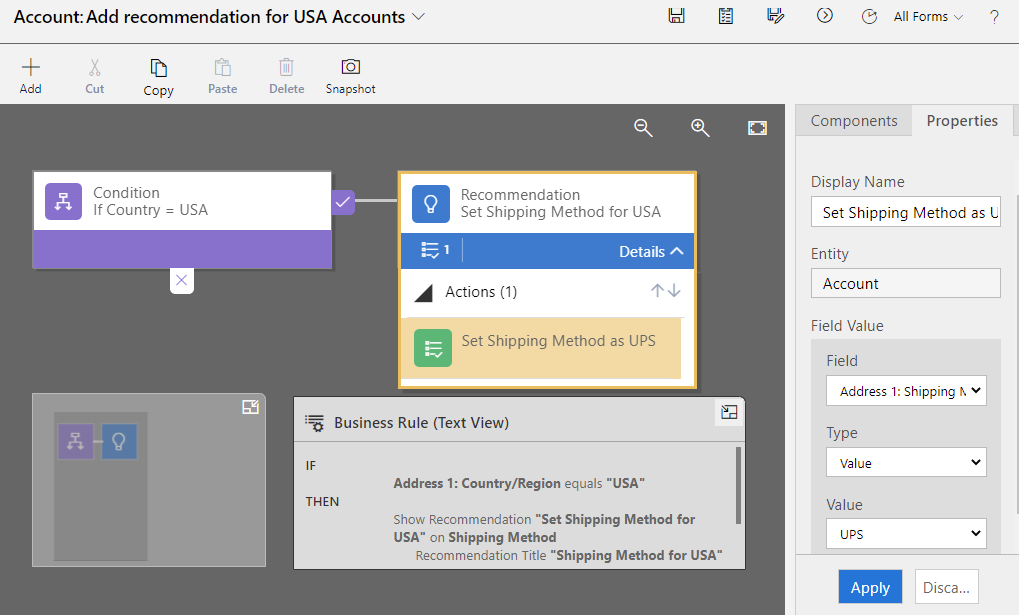
When you have completed all actions you’d like added to your Recommendation and Business Rule, you can Save & Activate it. Don’t forget to test in Sandbox!
More Resources
Here is a link to Microsoft Documentation which will give you more detail on using Business Rules in Power Apps.
For a Business Rules 101 refresher, check out this article I wrote in 2020. It goes into things like setting scope, all available actions and the rules.
Learn more about Dynamics 365 by checking out my other blogs here.