Fun with Flow: How a Dynamics 365 System Administrator can Get Started Using the Dataverse Connector
We’re going to walk through how to write a simple Flow using the Dataverse connector in Power Automate. Here are the business requirements:
- Sales reps will enter all Opportunities into Dynamics 365 using a model-driven app.
- The Management team wants special attention on any Opportunity that has a probability of 75% or higher.
- Individuals without licenses for Dynamics 365 will need to see which are hot Opportunities.
- Everyone uses Microsoft Teams and has a license.
Here’s how we can use Flow to solve for this problem!
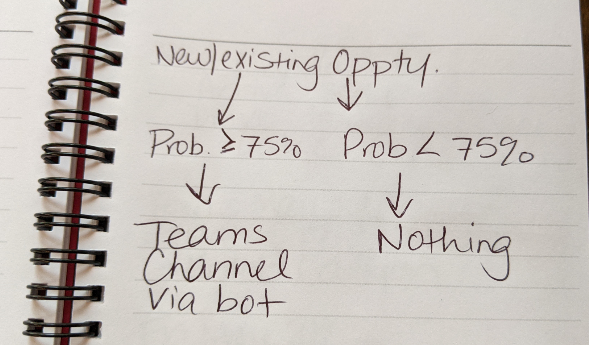
1. Map out what you want to happen. In a prior blog article, I talked about how important it is to map out your flow, especially if you’re new or newer and still getting use to Flowing in Power Automate. Here’s our very simple diagram for this scenario:
2. Identify connectors we need (you can use Connector Review or Microsoft documentation to help). We will use: Dataverse & Teams.
If you need a refresher on how to build an automated flow, check out this blog article for help.
Trigger: Dataverse
For our Flow, we want to use a trigger from the Dataverse connector (Note: the Dataverse connector replaced the legacy “Common Data Service” connector. It has the same actions and triggers, they only updated the name.)
In your Flow’s trigger, search for the Dataverse connector and you will see two triggers:
- When a flow step is run from a business process flow. Use this if your business process flow in your model-driven app should call a flow.
- When a row is added, modified or deleted. Use this to trigger your flow only after something is added, updated or deleted from a record.
We will select the second option here for the rest of this example. If you haven’t already, you may be prompted to authenticate the Dataverse connector and provide log-in credentials. Once you do that, you will see this:
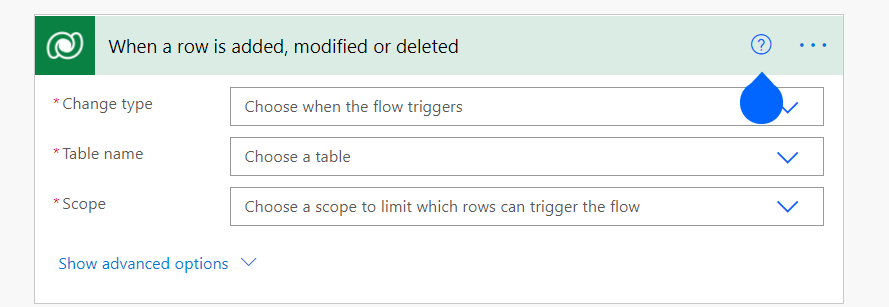
- Change type: select one option: create, create or delete, create or update, create or update or delete, delete, update, update or delete, or enter custom value.
- Table name: specify which table (entity) this should run on. All tables in your Dataverse environment will be displayed here, both out-of-the-box and custom tables.
- Scope: select from: business unit, organization, parent: child business unit or user. These are exactly the same as what you are using in Dynamics 365 classic workflow!
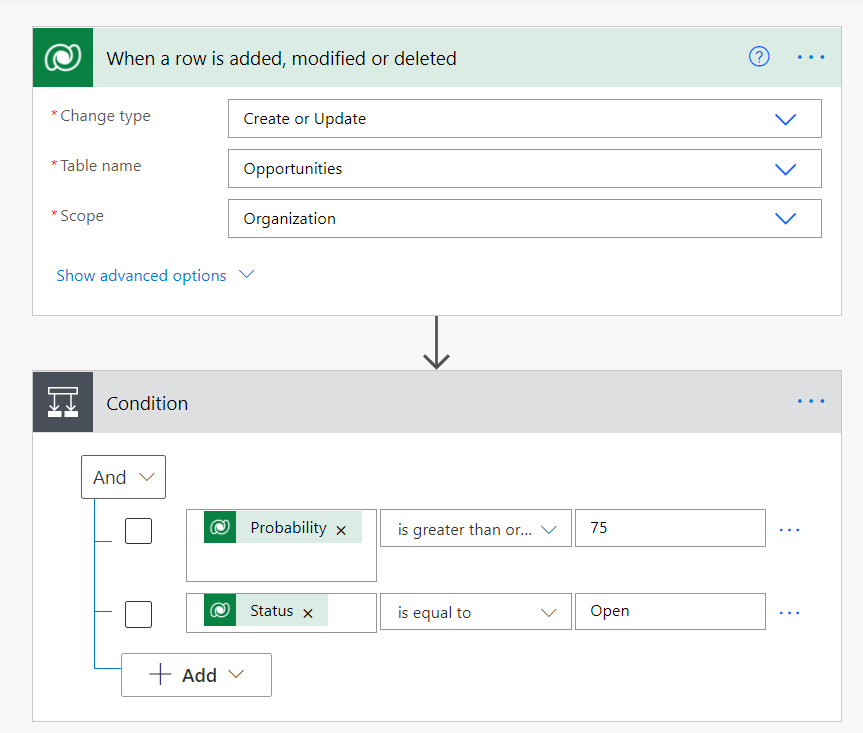
Once you select values for each of the above, you can press the + New step button to select the next step in your automation. In this example, our flow will run when an Opportunity is added or modified with a scope of Organization:

For this one, we’ve added a Condition to check that probability is greater than or equal to 75% and that status is Open:
We add a new step in the If yes box, selecting an action from Microsoft Teams: Post a message as the Flow bot to a channel. Select your Team, Channel and then create a message and headline using dynamic content:
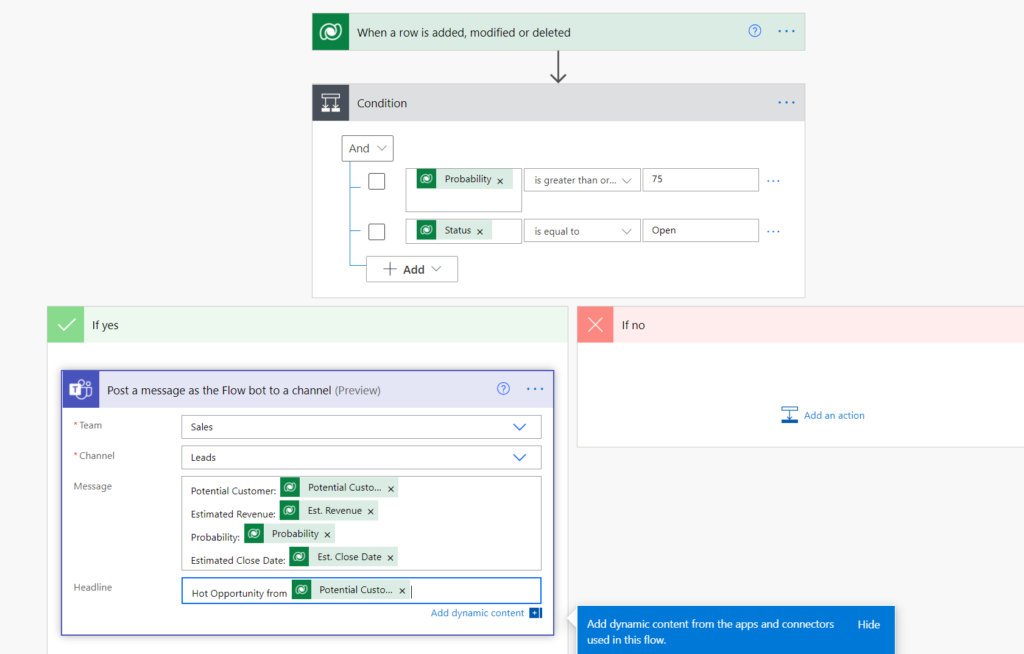
For this use case, we don’t care about anything that isn’t above 75% probability, so we’ll lave the If no box blank.
That’s it! Our simple Flow is complete. Next up, save it, run the Flow checker and test it.
Bonus: Keep This Flow Going with Nested Conditionals
If you’re anything like me, you love using nested conditionals in the Classic Workflow interface of Dynamics 365. Let’s take another look at the If no branch to show you how to add another conditional here.
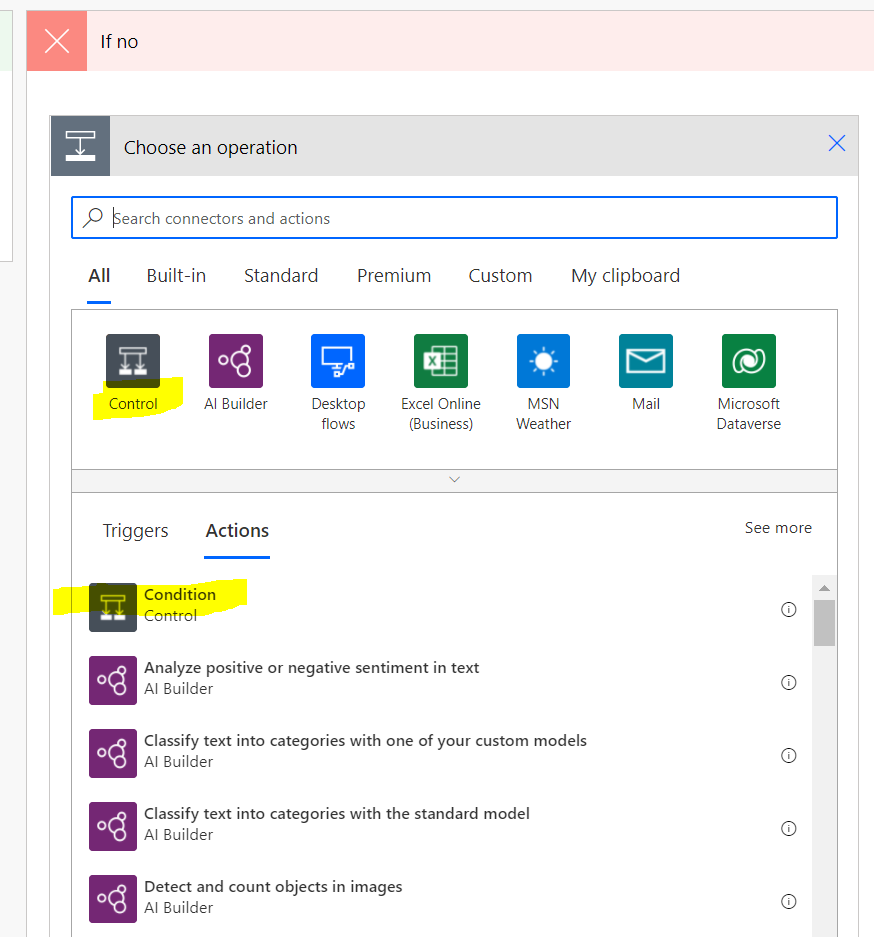
- In the If no box, click Add an action.
- Select Condition Control from the Actions
Let’s add in some more logic here and bring in additional connectors:
- If Probability is between 50-74%, I want to add a follow-up task assigned to the Opportunity owner for 1-week from today.
- If Probability is below 50%, I wand to add a follow-up task assigned to the Opportunity owner for 2-weeks from today.
Here’s what that looks like using Power Automate:
Note: we’re adding two new connectors here: Date & Time (in Built-In connectors) and Outlook Tasks.
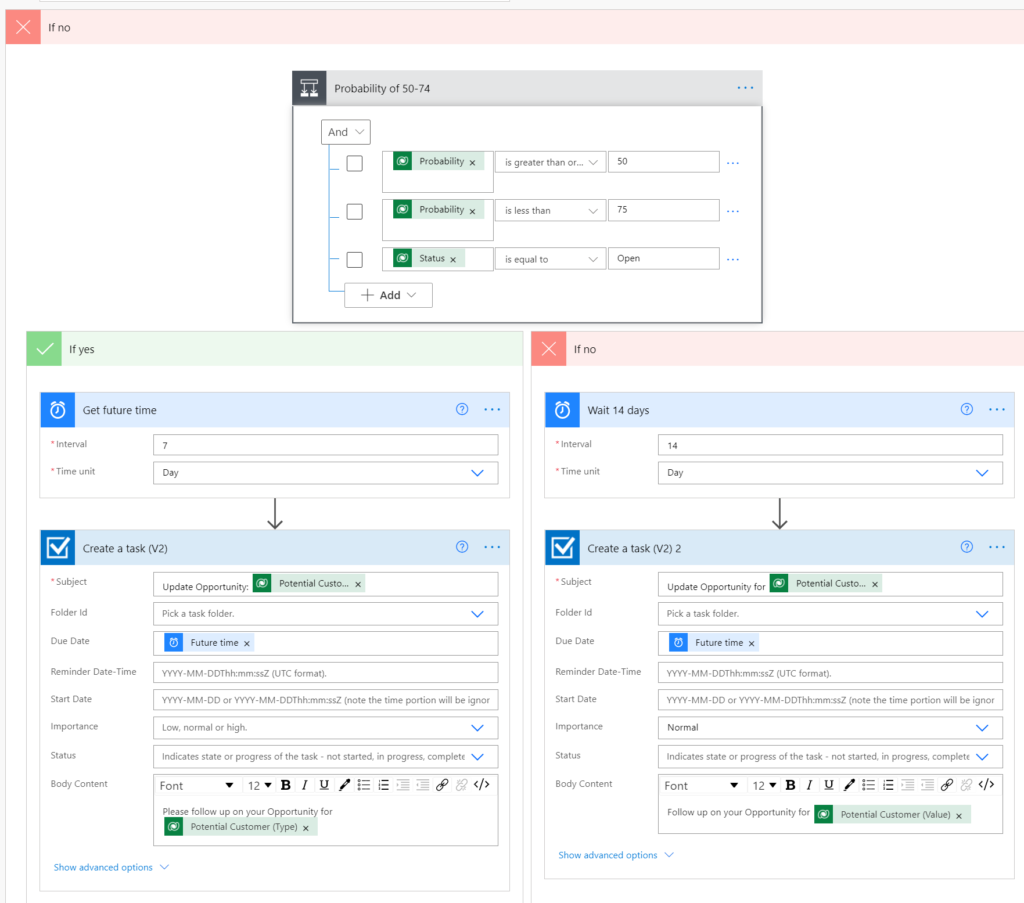
How we set Due Date of 7 and 14 Days from Today
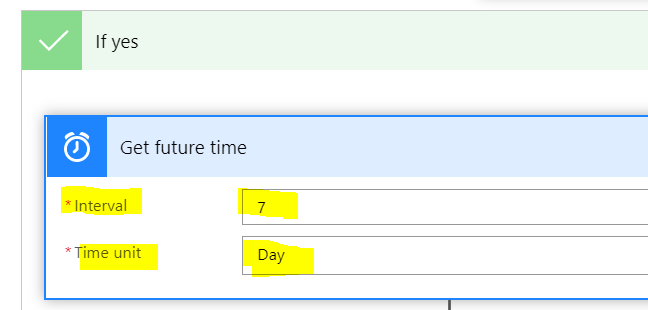
For this, we needed to us the Date & Time built-in connector in each Branch of our nested conditional. In the If yes box, we used Get future time like this:
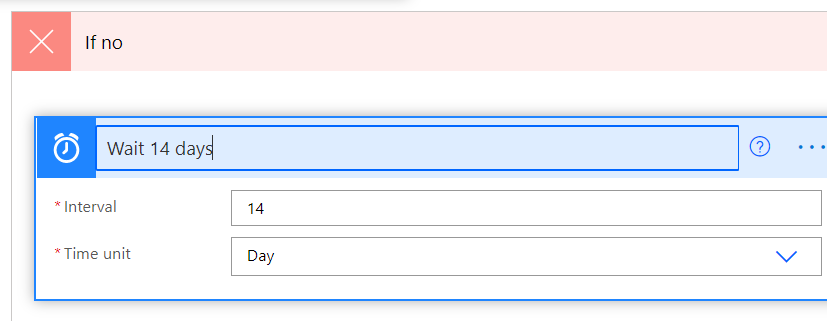
In the If no box, we used Get future time like this:
By placing these above the action to Create a task (V2), we are able to pull that dynamic content into our flow to use in future actions. (Our alternative is writing custom expressions, which seems much more difficult to me – but more developer-minded people will probably prefer it!)
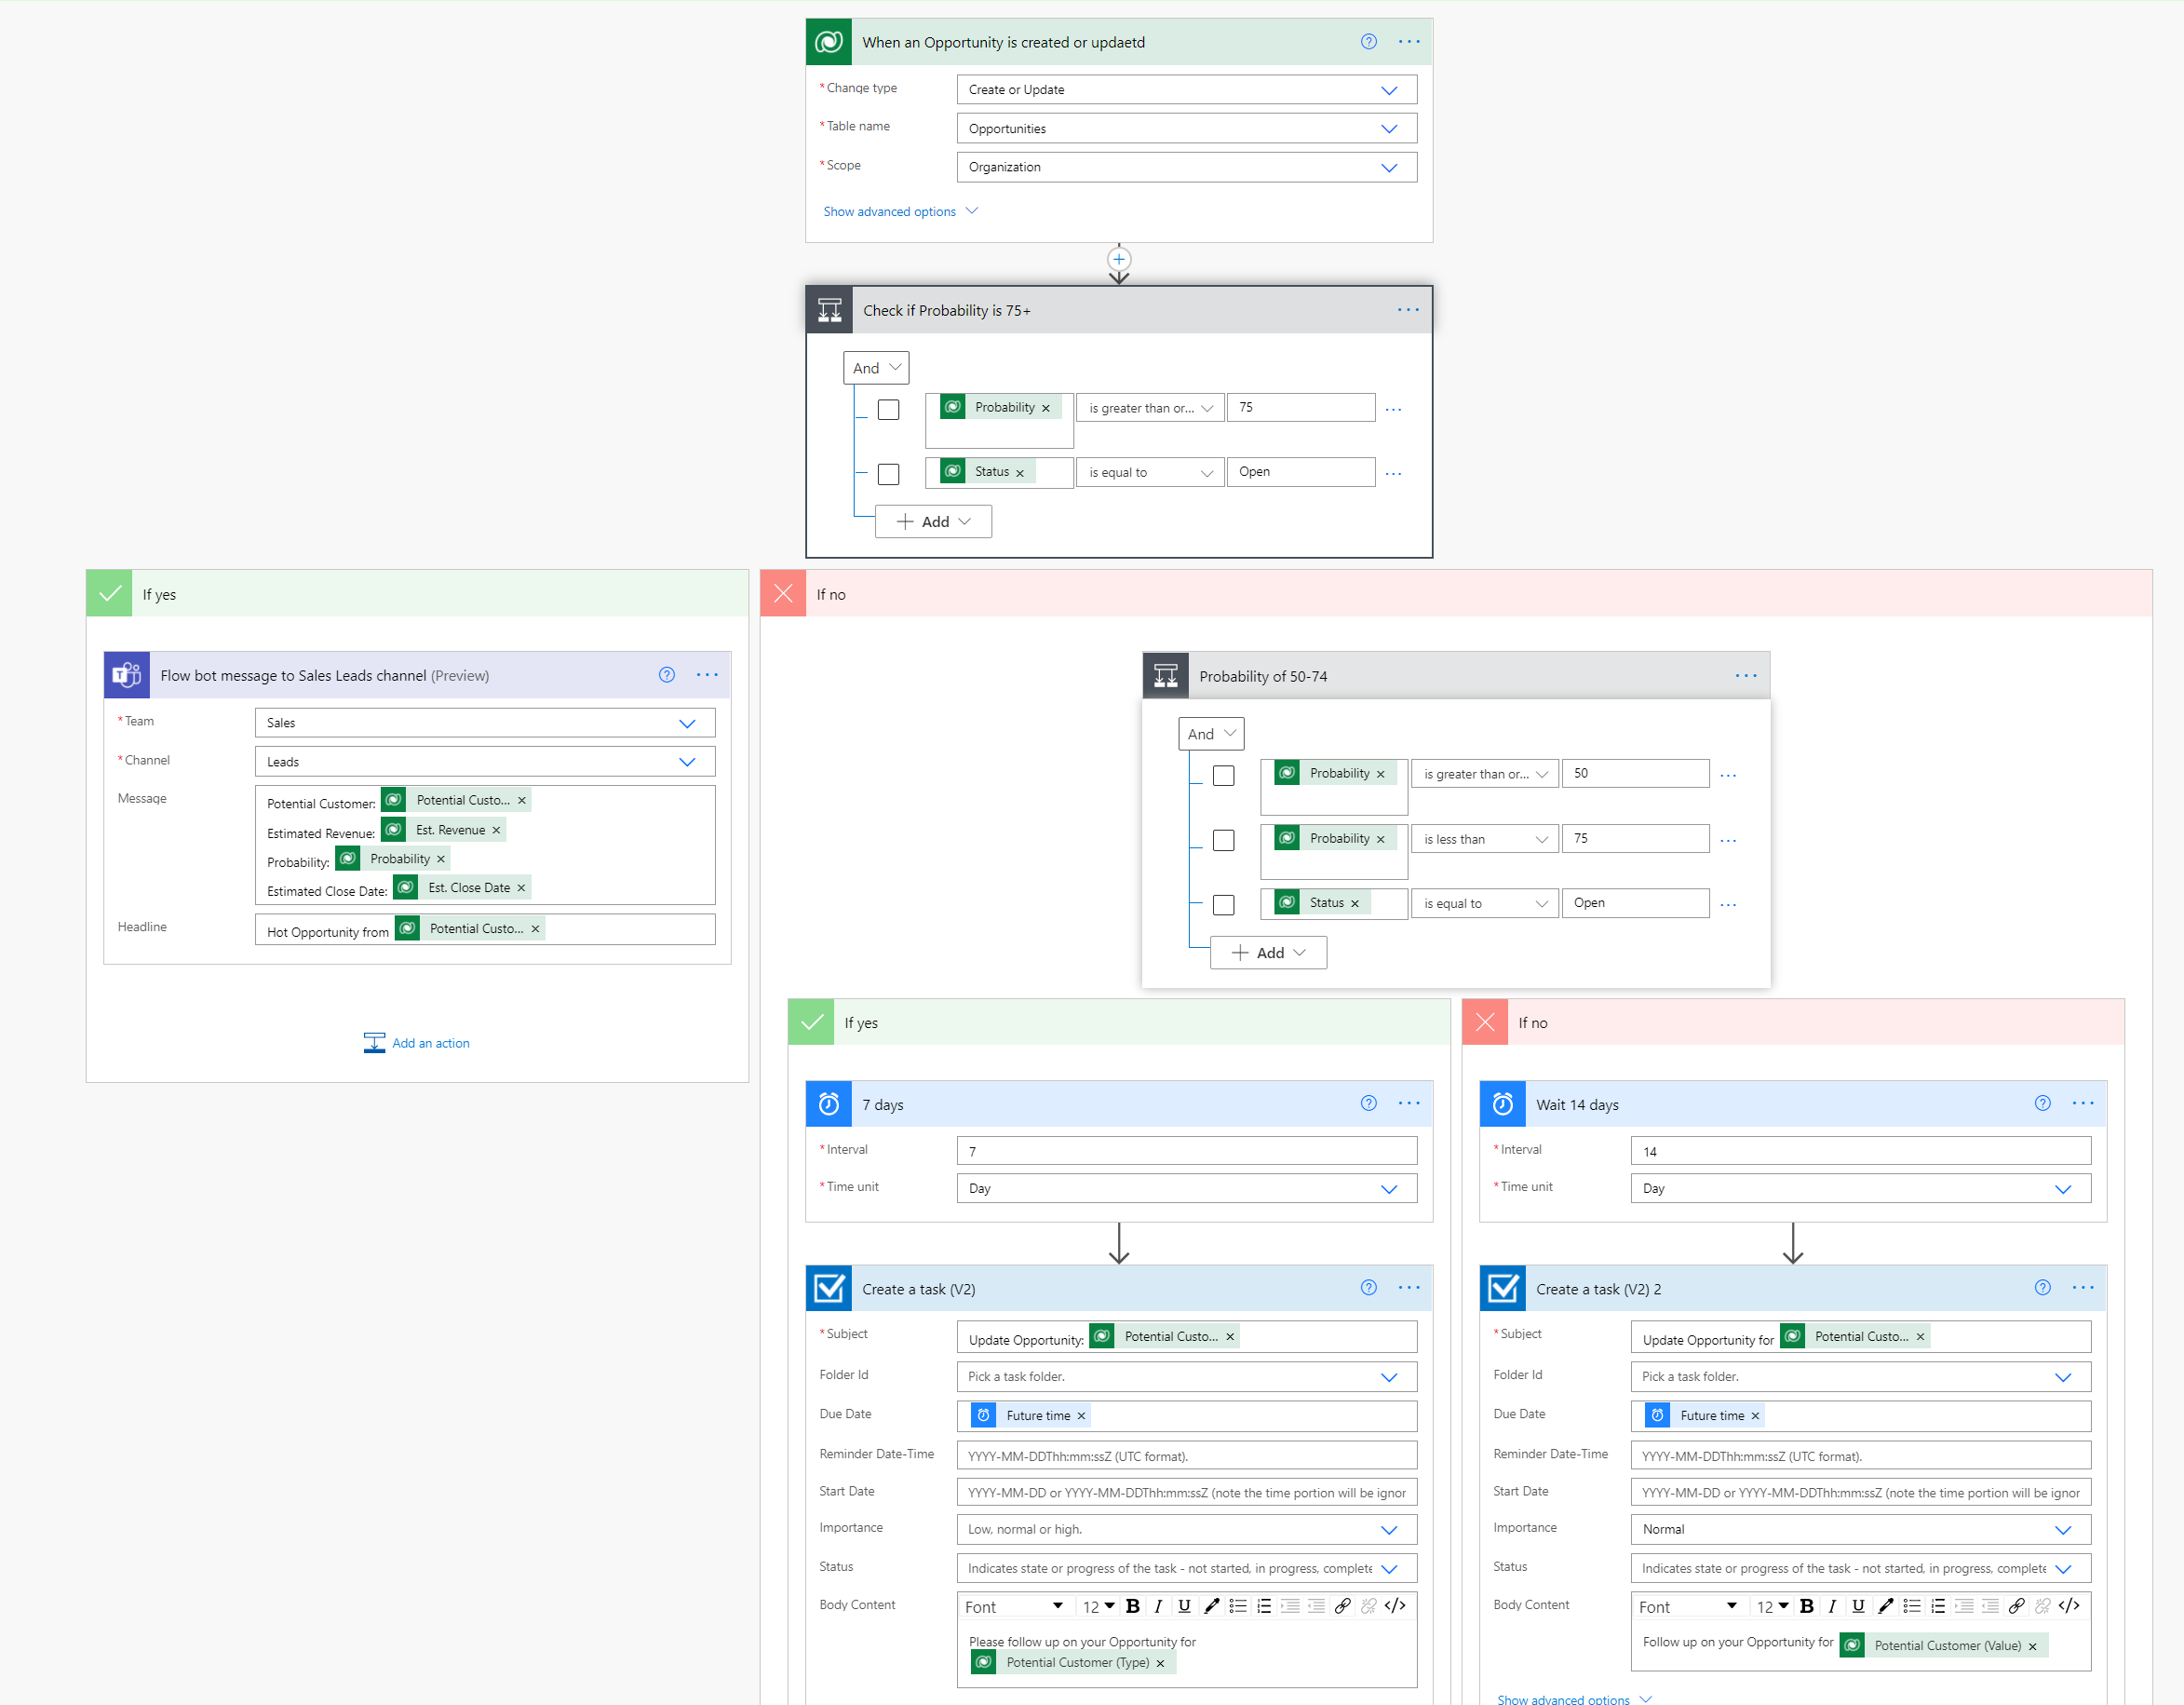
Our Flow in all of its entirety
Here’s the whole flow, with labels and including nested conditionals with Date & Time and the Outlook Task connectors: