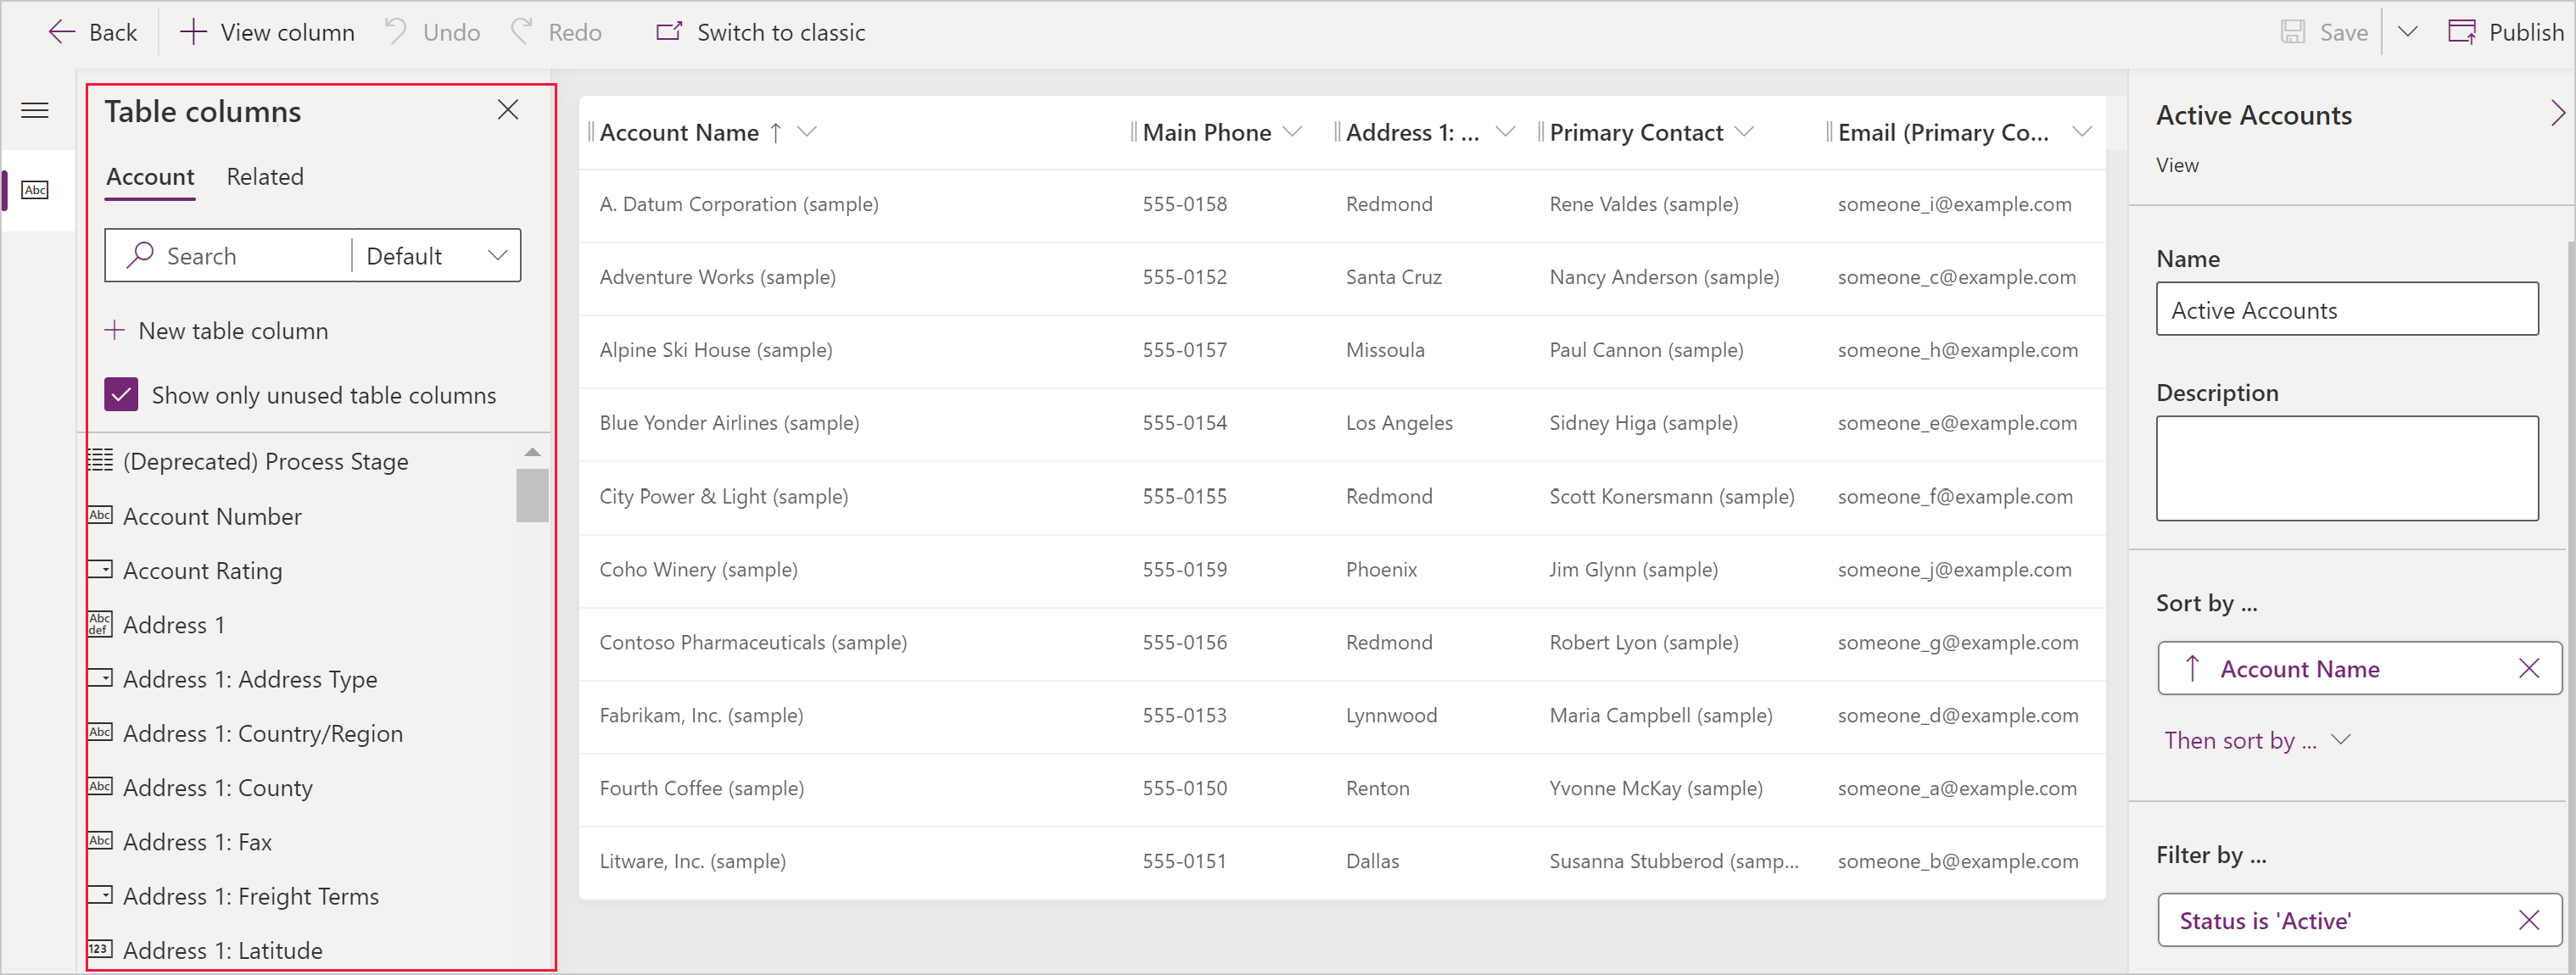
Last week, I blogged about how to add a new system view in Power Apps for Dynamics 365. Today, let’s talk about a simpler update – how you can change your existing system views.
Going forward, we assume you will be packaging all changes in solution files in a Sandbox environment, test it and then promote to Production (a System Admin best practice!)
Add Existing System Views to a Solution File in Power Apps
- Log into make.powerapps.com and navigate to your Sandbox environment.
- Make sure the Table (previously known as Entity) is in your Solution file.
- Navigate to Table in your Solution file, then click on the Views tab.
- At the top, click +Add Subcomponents

In the new panel that opens, select which View(s) you want to edit and add them to your solution file.
What can you update here?
After you have added a view to your solution file, there are a number of actions you can take when you open it:
- Add new columns to the view.
- Remove columns from the view.
- Change the column order and width.
- Configure how the data is sorted in this view.
- Change the filter criteria for this view.
Add new columns
On the left-hand side, you will view a list of any unused table columns (fields). To add any of these to your view, simply click and drag them onto your view canvas.

Remove columns
Removing columns is even simpler. On the view canvas, click the column you wish to remove from the view. Next, select Remove at the bottom of the list of options that appears:

Change the order and width of your columns
Changing the order of your columns is simple in Power Apps. Simply click on columns in this canvas and drag them to different areas to rearrange order. To change width, click on the lines between the columns and drag them left or right until you have reached the desired width.
Configure sort
On the right-hand side, you will find a panel to adjust Sort by and Filter by for this view. To configure your sort, you will select the field(s) and then select descending or ascending for each.
You can add a secondary sort by clicking the Then sort by… option (highlighted below):

Change the filter of your view
To update the filter criteria for your view, use the Filter by area of the panel on the right-hand side.
To adjust the filter, click the Edit filters…. button.

This opens a panel similar to Advanced Find where you can define or change your view’s filter criteria.

